Tesla Model S: Harness - Instrument Panel (Remove and Replace)
Tesla Model S (2012-2026) Service Manual / Electrical / Harness - Instrument Panel (Remove and Replace)
Removal
- Remove the driver's and front passenger's seats (refer to procedure).
- Remove the center console assembly (refer to procedure).
- Remove the IP carrier (refer to procedure).
Note: Mark the location of each edge clip before releasing it from the cross car beam.
- Begin removing the harness from the passenger's side, near the
door.
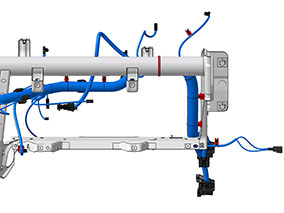
- Once the harness is released up to the HVAC assembly, move to
the driver's side of the vehicle, and begin removing the harness
from the steering column area.
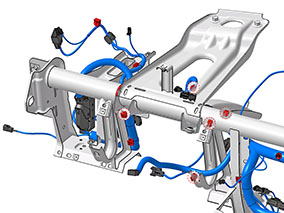
- Remove the steering wheel (refer to procedure). Tip: If necessary, the steering column can be removed instead of the steering wheel. However, removing the steering wheel eliminates the need to re-align the steering wheel after installation.
- Loosen the fasteners that secure the premium boost amplifier (if equipped) (refer to procedure).
- Disconnect the electrical connector from the premium boost amplifier, and continue to pull the harness away from the cross car beam.
- Loosen the fasteners that secure the OBDII port.
- Disconnect the electrical connector from the OBDII port, then continue to pull the harness away from the cross car beam.
- Disconnect the electrical connector from the brake on/off switch, then continue to pull the harness away from the cross car beam.
- Continue to remove the harness, working toward the HVAC
assembly.
Caution: Take care not to damage the temperature sensors that extend from the HVAC assembly.
- Remove the harness from the vehicle.
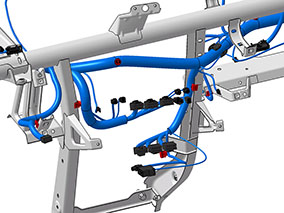
Installation procedure is the reverse of removal, except for the following:
- Start by routing the new harness through the space between the HVAC assembly and the steering column.
- Once the section of harness between the steering column and the driver's door is installed, test-fit the steering column to make sure that the harnesses that connect to it are properly positioned.
READ NEXT:
 Harness - Body Front Left (Remove and Replace)
Note: This procedure explains how to remove the front
left body harness from a vehicle with the 2nd Generation High
Voltage configuration. Vehicles with the 1st Generation High
Voltage
Module - Condenser Fan Control - LH (Remove and Replace)
Warning: If the vehicle has air suspension, activate "Jack"
mode on the touchscreen before raising and supporting the vehicle.
Removal
Raise and support the vehicle (refer to pro
Module - Door Controller (Remove and Replace)
Removal
Remove the door trim cover (refer to procedure)
Disconnect the door module harness connectors (x3).
Remove the screws (x3) that secure the control module to the
door panel
SEE MORE:
Bosch-Supplied Tools
223-34-36-08
Tesla part number:
n/a
Description:
Anti Static Mat/w Wrist Grounding Cord and Wrist Strap
Model:
n/a
Status:
Dis
Frame - Seat Back - 2nd Row Seat - LH (Remove and Replace)
Removal
Remove Rear LH seat back rest assembly and remove Pivot lock
from outboard side of assembly (refer to procedure)
Release and remove latch cover from seat back.
Release cover from seat back frame.
Remove
© 2019-2026 Copyright www.tesms.org
