Tesla Model S: Instrument Panel Overview
The instrument panel changes depending on whether Model S is:
- Off or Parked (shown below)
- Driving
- Charging
When Model S is off or Parked, the instrument panel shows remaining estimated range, vehicle status, and outside temperature.
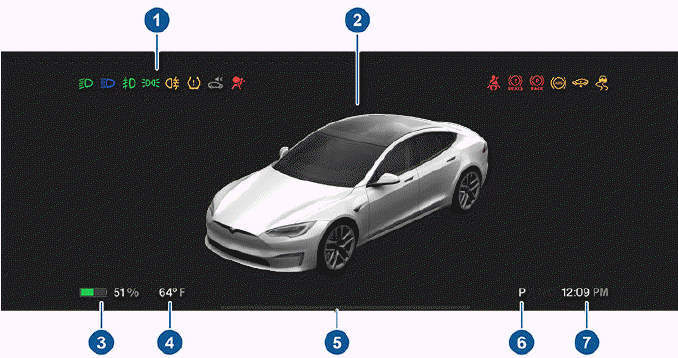
- When the car is off and you initially press the brake, indicator lights flash briefly along the top of the instrument panel. Unless an indicator light applies to a current situation, it should turn off. If an indicator light fails to turn on or off, refer to Indicator Lights.
- An image of your car and its accompanying status (such as lights on, door open, etc.).
- Total estimated driving distance (or energy) available. Instead of driving distance, you can display the percentage of battery energy remaining. To do so, touch Controls > Display > Energy Display.
NOTE: When anticipating when you need to charge, use estimates as a general guideline only.
- Estimated outside temperature.
- Pay attention to instructions or important alert messages that display here. If any alerts are in effect, you can view information about them by touching Controls and then touching the bell icon located at the top of the screen.
- Currently selected drive mode: Park, Reverse, Neutral, or Drive. If Auto Shift out of Park is enabled, Drive or Reverse is automatically selected (based on sensor input) and displayed on the instrument panel when the driver's door is closed and seatbelt is buckled.
- Current time of day.
READ NEXT:
 Instrument Panel - Driving
When Model S is driving (or ready to drive), the instrument panel shows your
current driving status and a real-time
visualization of the road as detected by the Autopilot components (see About
Auto
Indicator Lights
Indicator lights display along the top of the instrument
panel to show status and alert you of specific vehicle
conditions.
A brake system fault is
detected or the
brake fluid level is low. Conta
Wipers and Washers
You can access wiper settings by touching the wiper
button on the steering yoke or touching Controls >
Wipers.
Press the wiper button on the steering yoke to wipe the
windshield.
Press and hold
SEE MORE:
Lamp - Reflex - Rear - LH (Remove and Replace)
Removal
Remove rear fascia assembly for access (refer to procedure)
Release clips (x2) securing reflex lamp to rear fascia.
Remove reflex lamp.
Installation
Installation procedure is the reverse of
Door - Charge Port - Non-Motorized (Remove and Replace)
Removal
Remove the LH tail light assembly (refer to procedure).
Remove the screws (x3) that secure the charge port door to the
tail light assembly.
Remove the charge port door.
Installation
© 2019-2026 Copyright www.tesms.org
