Tesla Model S: Module - HVAC Controller - RCCM (Remove and Replace)
Tesla Model S (2012-2026) Service Manual / Electrical / Module - HVAC Controller - RCCM (Remove and Replace)
Removal
- Remove the IP carrier (refer to procedure).
- Disconnect the HVAC harness connector from the Remote Climate Control Module (RCCM).
- Remove the screws (x4) that secure the RCCM to the HVAC casing.
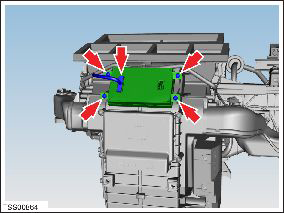
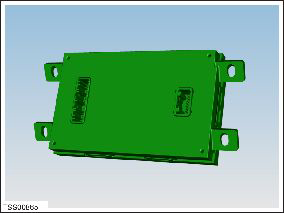
- Remove the RCCM from the HVAC mounting.
Installation procedure is the reverse of removal, except for the following: Use Toolbox to update or redeploy the firmware:
- If the vehicle is not running the latest firmware, run the "Vehicle Firmware Update" procedure.
- If the vehicle is running the latest firmware, run the "Firmware Redeploy" procedure.
READ NEXT:
 Module - Seat Heater - Driver's Seat (Remove and Replace)
Removal
Open door.
Power seat height adjust fully upwards for access.
Disconnect seat heater module connectors and harnesses (x2).
Module - TPMS - Baolong (Remove and Replace)
Warning: If the vehicle has air suspension, activate "Jack"
mode on the touchscreen before raising and supporting the vehicle.
Removal
Raise and support the vehicle (refer to pro
Module - TPMS - Continental (Remove and Replace)
Removal
Remove RH rear seat bolster (refer to procedure).
Remove the 2nd row seat cushion (refer to procedure).
Release the lower section of the RH sill panel to access the
TPMS E
SEE MORE:
Charging the Battery
Select Manual Mode from the Charge/Discharge Mode menu.
Type the desired SOC in the Target SOC% field, or drag the
Target SOC% knob to the desired SOC.
Turn on the HV power supply.
Lamps - Fog - Front - Adjust
Position the vehicle for adjusting the fog lamps:
In a darkened area.
On a level surface.
Perpendicular to a wall that has a matte white
surface. The wall must be at least 3.7 m (12 ft) wide
and 1.87 m (6 ft) high.
The fog lamps are 10 m
© 2019-2026 Copyright www.tesms.org
