Tesla Model S: Module - TPMS - Continental (Remove and Replace)
Tesla Model S (2012-2026) Service Manual / Electrical / Module - TPMS - Continental (Remove and Replace)
Removal
- Remove RH rear seat bolster (refer to procedure).
- Remove the 2nd row seat cushion (refer to procedure).
- Release the lower section of the RH sill panel to access the
TPMS ECU.
Caution: Do not remove the entire trim panel.
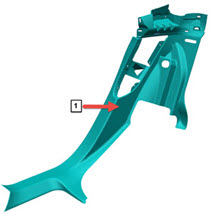
1 Location of TPMS ECU. - Release the harness from the base of the TPMS ECU.
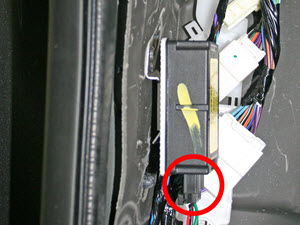
- Slide the ECU downwards to remove it from the metal bracket.
Installation procedure is the reverse of removal, except for the following:
Caution: Replace any broken clips.
Perform the TPMS sensor ID learn procedure (refer to procedure)
Perform a road test.
READ NEXT:
 Module - HomeLink Transmitter (Remove and Replace)
Removal
Remove the front fascia (refer to procedure).
Disconnect the HomeLink transmitter module from the wiring
harness.
Release the clips (x2) that secure the HomeLink transmitt
Sensor - Parking Distance - Front - Each (Remove and Replace)
Removal
Remove the front fascia assembly (refer to procedure).
Set the fascia assembly on a flat, clean surface.
Disconnect the parking distance sensor connector.
Sensor - Parking Distance - Rear - Each (Remove and Replace)
Removal
Remove the rear fascia assembly (refer to procedure).
Set the fascia assembly on a flat, clean surface.
Disconnect the parking distance sensor connector.
SEE MORE:
Grill - Fascia - Front (Remove and Replace)
Removal
Vehicles with 1st generation front fascia applique only:
Remove the front fascia applique refer to procedure.
Vehicles with 2nd generation front fascia applique only:
Remove the front fascia refer to procedure.
Position front fascia assembly at a suitable working hei
Acceleration Modes
Touch Controls > Pedals & Steering > Acceleration to
choose a preferred acceleration mode:
Chill limits acceleration for a slightly smoother and
gentler ride.
NOTE: When Chill is selected, Chill displays on the
instrument panel, above the driving speed.
Sport provides the normal l
© 2019-2026 Copyright www.tesms.org
