Tesla Model S: Motor - Fan assembly - HVAC (Remove and Replace)
Tesla Model S (2012-2026) Service Manual / Thermal Management / Motor - Fan assembly - HVAC (Remove and Replace)
Removal
- Power the passenger seat fully rearward for access.
- Remove the passenger footwell closing trim (refer to procedure).
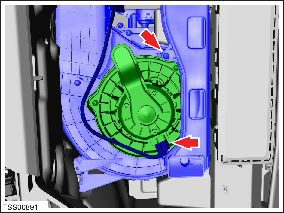
- Disconnect the fan harness connector and position the harness aside.
- Remove the screw that secures the heating duct to the HVAC
assembly (torque 1 Nm).
- Remove the screws (x3) that secure the fan housing to the HVAC
assembly (torque 1 Nm).
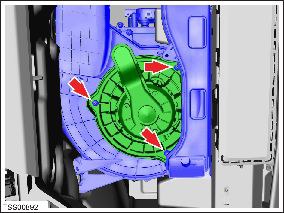
- Release the fan housing from the HVAC assembly and maneuver it past the heater duct. Caution: Take care not to damage component(s).
- Remove the HVAC fan assembly from the vehicle. Note: Clean the affected areas before installation.
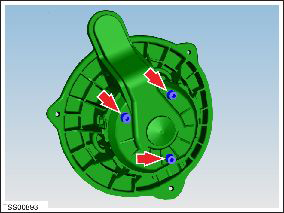
- Remove the screws (x3) that secure the fan and motor to the housing.
- Remove the fan and motor from the fan housing.
Note: Clean the affected areas before installation.
READ NEXT:
 Hose - HVAC - Drain (Remove and Replace)
Removal
Remove the LH closeout extension assembly (refer to procedure).
Note: For vehicles built with the cold weather
package between May 31, 2013 and July 11
Hose - Front HVAC - Drain (Dual Motor) (Remove and Replace)
Remove
Perform the electrical isolation procedure (refer to procedure).
Remove the RH steering brace:
Remove the bolt that secures the steering brace to
Heater - PTC (Remove and Replace)
Warning: Only technicians who have been trained in High
Voltage Awareness are permitted to perform this procedure. Proper
personal protective equipment (PPE) and insulating HV gloves with a
SEE MORE:
Using a Car Cover
To preserve the cosmetic appearance of the body when
Model S is not being used, use a genuine Tesla car cover.
Car covers can be purchased from Tesla. See Parts and
Accessories.
CAUTION: Use only a Tesla-approved car cover
when Model S is plugged in. Using a non-Tesla car
cover can prevent
Steering Rack (RWD) (Remove and Replace) - Removal
Warning: If the vehicle has air suspension,
activate "Jack" mode on the touchscreen before raising and
supporting the vehicle.
Removal
Ensure that the front road wheels are in a straight ahead
position.
Lock the steering wheel in position.
Remove the underhood s
© 2019-2026 Copyright www.tesms.org
