Tesla Model S: 12V Battery Bracket Beam (Remove and Replace)
Tesla Model S (2012-2026) Service Manual / Electrical / 12V Battery Bracket Beam (Remove and Replace)
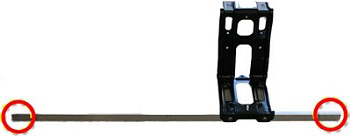
Removal
- Remove the 12V battery (refer to procedure).
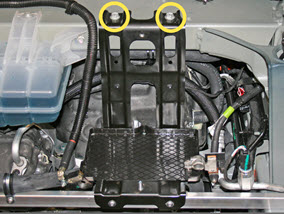
- Release the 2 bolts that secure the 12V battery bracket to the
front crossmember (torque 15 Nm).
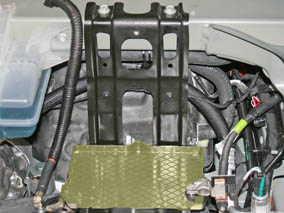
- Remove the 12V battery tray.
- Release the 2 clips that secure the battery sensor harness to
the bracket.
- Release the barrel clip that secures the coolant hose to the rear of the bracket.
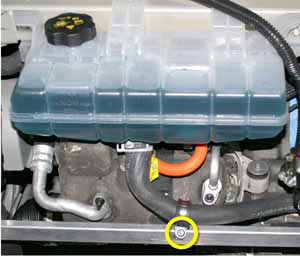
- Release the bolt that secures the coolant hose retaining ring to
the battery support brace (torque 5 Nm). Gently pull the hose away
from the brace.
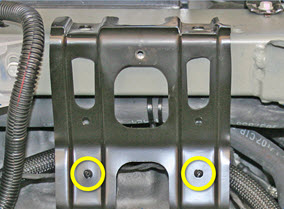
- On each side of the vehicle, release the bolt that secures the
battery support brace to the front frame rail (torque 3.5 Nm).
Remove the battery support brace and bracket assembly.
Installation procedure is the reverse of removal.
READ NEXT:
 Harness - Instrument Panel (Remove and Replace)
Removal
Remove the driver's and front passenger's seats (refer to
procedure).
Remove the center console assembly (refer to procedure).
Remove the IP carrier (refer to procedure).
Harness - Body Front Left (Remove and Replace)
Note: This procedure explains how to remove the front
left body harness from a vehicle with the 2nd Generation High
Voltage configuration. Vehicles with the 1st Generation High
Voltage
Module - Condenser Fan Control - LH (Remove and Replace)
Warning: If the vehicle has air suspension, activate "Jack"
mode on the touchscreen before raising and supporting the vehicle.
Removal
Raise and support the vehicle (refer to pro
SEE MORE:
Forward Junction Box - 2nd Generation - 40 Amp Fuse (RWD) (Remove and
Replace)
Warning: Only technicians who have been trained in High
Voltage Awareness are permitted to perform this procedure. Proper
personal protective equipment (PPE) and insulating HV gloves with a
minimum rating of class 00 (500V) must be worn any time a high
voltage cable is handled. Refer
Trim - Rear Trunk - Side - LH (Remove and Replace)
Removal
Remove the 'C' post rear trim (refer to procedure).
Remove the trunk sill panel.
Remove the trunk side garnish trim.
Remove the trunk floor tri
© 2019-2026 Copyright www.tesms.org
