Tesla Model S: Brake Sensor Cluster - ESC (Remove and Replace)
Tesla Model S (2012-2026) Service Manual / Brakes / Brake Sensor Cluster - ESC (Remove and Replace)
Removal
- Remove center console assembly (refer to procedure)
-
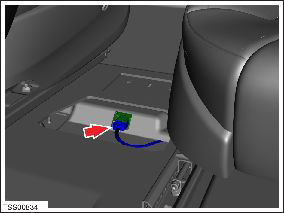
Disconnect wiring harness connector.
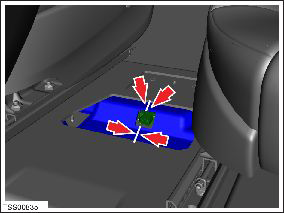
- Carefully cut acoustic padding covering ESC sensor.
-
Peel back acoustic padding to expose ESC
module.
-
Remove nuts (x2) securing ESC module to body
(torque 6 Nm).
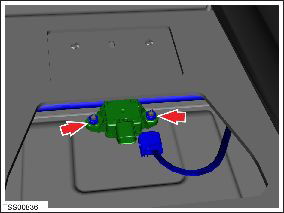
-
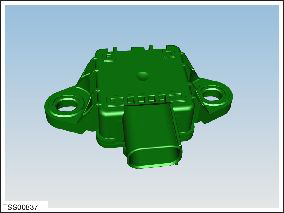
Remove ESC module.
Installation procedure is the reverse of removal, except for the following:
- Position the acoustic padding over the ESC module and secure the edges with tape.
- If the vehicle is not running the latest firmware, run the "Vehicle Firmware Update" procedure.
- If the vehicle is running the latest firmware, run the "Firmware Redeploy" procedure.
- In Toolbox, perform the Stability Control (ESP) Program.
READ NEXT:
 Tire - Front - LH
Warning: Always read and
understand the tire equipment operator's manual before operating the
wheel balancer or tire changer.
Note: These instructions
are based on the Hunter TC3900 tire
Tire - Front - LH - Rebalance
Warning: Always read and
understand the tire equipment operator's manual and on-screen
instructions before operating the wheel balancer or tire changer.
Note: These instructions are
based on
SEE MORE:
Brake Hose - Flexible - Front - LH (Remove and Replace)
Warning: If the vehicle
has air suspension, activate "Jack" mode on the touchscreen before
raising and supporting the vehicle.
Removal
Remove the front LH wheel
(refer to procedure).
Clean the areas that surround the connections
at each end of the brake h
Pad - Lifting - Each (Remove and Replace)
Removal
If the vehicle is equipped with air suspension, set the
suspension to "High" or "Very High".
Tip: If necessary, this procedure can be performed with the
vehicle on a 4 post lift (refer to procedure).
Remove the plastic rivets (x2) that
© 2019-2026 Copyright www.tesms.org
