Tesla Model S: Cooling System - Partial Refill and Bleed
Tesla Model S (2012-2026) Service Manual / Thermal Management / Cooling System - Partial Refill and Bleed
Refill
Caution: Use the specified coolant only. In this manual, refer to General Information > Capacities, Fluids, and Lubricants > Fluids.
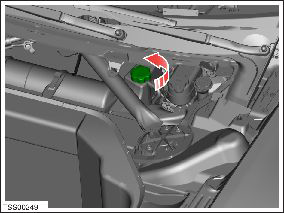
- Remove the coolant reservoir cap (refer to procedure).

- Connect a laptop with Toolbox to the vehicle.
- In Toolbox, select Views > Thermal > Fluid Drain and Fill.
- Ensure that the "Coolant fill" box is checked. Caution: Ensure that the vehicle is not charging before continuing to the next step in this procedure.
- Click the Start/Play button.
- Fill the reservoir to the "MAX" line with the specified coolant while the "Fluid Drain and Fill" routine is running.
- In Toolbox, select Views > Thermal > Coolant Air Purge. Run the coolant air purge routine.
- Carefully monitor the coolant level while the routine is running, adding coolant as required. Note: Do not allow the fluid level to drop below the "MIN" line during this procedure. Otherwise, air enters the system and the procedure must be repeated.
- The coolant level should stabilize before the routine ends. If the coolant level is still dropping, perform the routine again.
- Ensure that the coolant level is between the "NOM" and "MAX" lines.
- Install the coolant reservoir cap.
READ NEXT:
 Cooling System - Drain and Refill
Note: Make sure at least 14 L of the specified coolant is
available before beginning this procedure.
Caution: Use the specified coolant only. In this manual, refer
to General Informati
 Coolant System - Check and Fill
Check & Top-Up
Remove coolant cap from reservoir.
Fill reservoir to correct level.
Reinstall the cap.
 Cooling System - Vacuum Refill
Note: Make sure at least 14 L of the specified coolant is
available before beginning this procedure.
Caution: Use the specified coolant only. In this manual, refer
to General Informati
SEE MORE:
 Alignment Check
Raise the alignment platform until it is clear
of all 4 rack locks.
Lower the alignment platform onto the rack
locks and ensure that it is level.
Secure all 4 alignment optical targets.
Perform the rolling compensation.
Remove the pins from the sli
 Cleaning the Exterior
To prevent damage to the paint, immediately remove
corrosive substances (bird droppings, tree resin, dead
insects, tar spots, road salt, industrial fallout, etc.). Do
not wait until Model S is due for a complete wash. If
necessary, use denatured alcohol to remove tar spots
and stubborn grease s
© 2019-2026 Copyright www.tesms.org

