Tesla Model S: Cover - Outer Side - Driver's Seat (Remove and Install)
Tesla Model S (2012-2026) Service Manual / Seats / Cover - Outer Side - Driver's Seat (Remove and Install)
Removal
- Open both driver's side doors.
- Power the seat height adjust fully upwards for access.
- Remove the screw that secures the outer side cover to the seat
(torque 1 Nm).
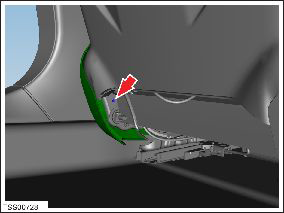
- Carefully release the outer side cover from the retaining
bracket.
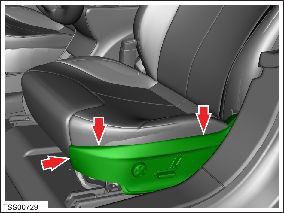
- Reposition the outer side cover and disconnect the seat control
switch connectors and harnesses (x3).
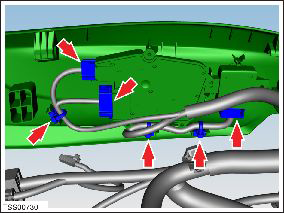
- Release the clips (x3) that secure the seat harness to the cover.
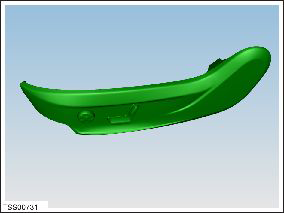
- Remove the outer side cover assembly.
Cover - Outer Side - Driver's Seat (Remove and Replace)
Removal- Remove the driver's seat outer cover (refer to procedure).
- Remove the seat height adjust switch (refer to procedure).
- Remove the back rest and cushion adjust switch (refer to procedure).
READ NEXT:
 Cover - Back Rest - Driver's Seat (Remove)
Removal
Prepare a padded work area
Remove the driver's seat assembly (refer to procedure). With an
assistant, place the seat onto a padded work area so that the
plastic seat back
Cover - Back Rest - Driver's Seat (Install)
Installation
Install new fir tree clips (x4) into the new seat back:
Position the fir tree clip into the bracket.
SEE MORE:
Cleaning the Exterior
To prevent damage to the paint, immediately remove
corrosive substances (bird droppings, tree resin, dead
insects, tar spots, road salt, industrial fallout, etc.). Do
not wait until Model S is due for a complete wash. If
necessary, use denatured alcohol to remove tar spots
and stubborn grease s
Drive Unit - Rear - Large (Remove and Install)
Special tools required for this procedure:
Supplier
Part Number
Description
Tesla
1000991
Axle Extractor
Note: Use 1000991 for a large drive unit only.
© 2019-2026 Copyright www.tesms.org
