Tesla Model S: DCDC Converter (Dual Motor) (Remove and Replace)
Warning: Only technicians who have been trained in High Voltage Awareness are permitted to perform this procedure. Proper personal protective equipment (PPE) and insulating HV gloves with a minimum rating of class 00 (500V) must be worn any time a high voltage cable is handled. Refer to Tech Note TN-15-92-003, "High Voltage Awareness Care Points" for additional safety information.
Removal
- Disconnect 12V and HV power (refer to procedure).
- Remove the wiper motor (refer to procedure).
- Remove the LH and RH shock tower to bulkhead struts (refer to procedure).
- Release the bolts (x2) that secure each fuse box to the front crossmember (torque 5 Nm).
- If the vehicle is equipped with air suspension, release the
bolts (x2) that secure the air reservoir (torque 2.5 Nm). Carefully
set the reservoir in the RH side of the underhood area.
Note: It is not necessary to disconnect the air lines.
.png)
- Remove the battery coolant heater (refer to procedure).
Caution: Do not allow coolant to spill onto the High Voltage Battery, forward junction box, DCDC Converter, battery coolant heater, or any harnesses.
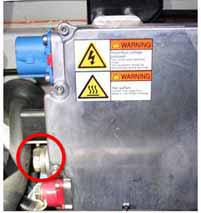
Tip: After removing the heater, plug the upper coolant hose on the DCDC converter and remove the clamp. This provides additional clearance in the working area to remove the DCDC converter.
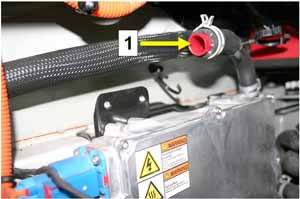
| 1 | Plugged coolant hose |
- Release the harnesses (x2) on the RH side of the DCDC converter.
.png)
- Clamp and release the lower hose on the DCDC converter.
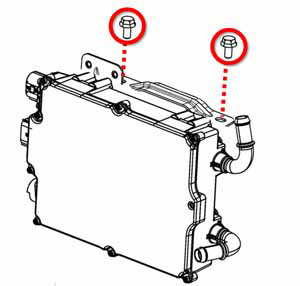
- Release the bolts (x2) that secure the DCDC converter bracket to
the bulkhead (torque 22 Nm).
- Release the nut that secures the bracket on the lower LH side of
the DCDC converter (torque 22 Nm).
Caution: This nut is very difficult to retrieve if dropped. It might be helpful to use a magnet to hold the nut while it is being removed.

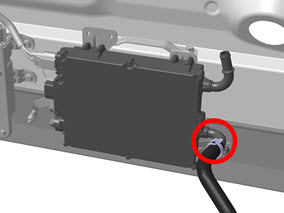
- Release the nut that secures the ground strap to the stud on the
bulkhead (torque 9 Nm).
- Release the ground bolt from the DCDC converter (torque 25 Nm).
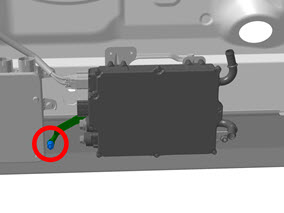
- Release the 12V positive bolt from the DCDC converter (torque 13
Nm).

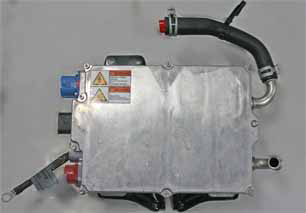
- Remove the DCDC converter from the vehicle.
Installation procedure is the reverse of removal, except for the following:
- Transfer the top coolant hose to the new DCDC converter.
- Refill and bleed the cooling system (refer to procedure).
- If necessary, adjust the wipers (refer to procedure).
READ NEXT:
 Forward Junction Box - 2nd Generation (Remove and Replace)
Warning: Only technicians who have been trained in High
Voltage Awareness are permitted to perform this procedure. Proper
personal protective equipment (PPE) and insulating HV gloves with a
Forward Junction Box - 2nd Generation - 20 Amp Fuse (RWD) (Remove and
Replace)
Warning: Only technicians who have been trained in High
Voltage Awareness are permitted to perform this procedure. Proper
personal protective equipment (PPE) and insulating HV gloves with a
Forward Junction Box - 2nd Generation - 40 Amp Fuse (RWD) (Remove and
Replace)
Warning: Only technicians who have been trained in High
Voltage Awareness are permitted to perform this procedure. Proper
personal protective equipment (PPE) and insulating HV gloves with a
SEE MORE:
Limitations and Inaccuracies
Lane Assist features cannot always detect lane markings
and you may experience unnecessary or invalid warnings
in these situations:
Visibility is poor and lane markings are not clearly
visible (due to heavy rain, snow, fog, etc.). The exact
detection zone of the ultrasonic sensors varies
d
Sway Bar - Front (RWD) (Remove and Replace)
Warning: If the vehicle has air suspension, activate "Jack"
mode on the touchscreen before raising and supporting the vehicle.
Removal
Remove the underhood storage unit (refer to procedure).
Remove the front upper wheel arch liners (refer to procedure).
Remove and d
