Tesla Model S: Forward Junction Box - 2nd Generation - 20 Amp Fuse (RWD) (Remove and Replace)
Warning: Only technicians who have been trained in High Voltage Awareness are permitted to perform this procedure. Proper personal protective equipment (PPE) and insulating HV gloves with a minimum rating of class 00 (500V) must be worn any time a high voltage cable is handled. Refer to Tech Note TN-15-92-003, "High Voltage Awareness Care Points" for additional safety information.
Note: This procedure only applies to RWD vehicles with the 2nd generation High Voltage configuration. The Forward Junction Box (FJB) is part of the DCDC converter for vehicles with the 1st generation High Voltage Configuration.
Special tools required for this procedure:
| Supplier | Part Number | Description |
| Tesla | 1058194-00-A | Fuse Puller, small (red) |
| Tesla | 1051659-00-A | Access Service Tool, Frunk |
- Perform the vehicle electrical isolation procedure (refer to procedure).
- Remove the underhood storage extension unit (refer to procedure).
- Position the frunk access service tool.
- Disconnect the clips (x4) that secure the coolant hose to the
crossbar.
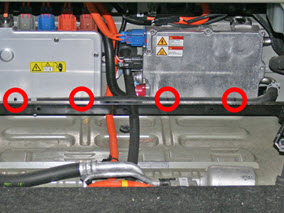
- Remove the crossbar from the vehicle.
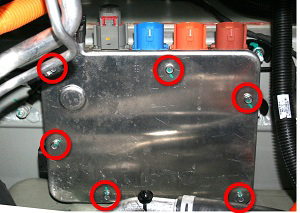
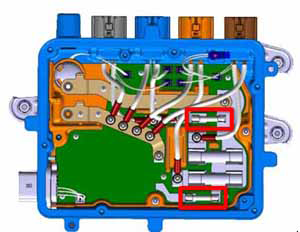
- Release the bolts (x6) that secure the forward junction box
cover (torque 6.5 Nm). Remove the cover.
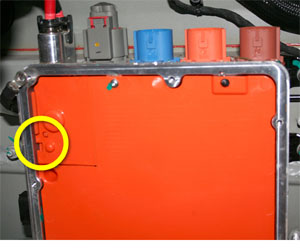
- Use a small, insulated screwdriver or similar tool to pry open
the cover on the RH side of the FJB.
Warning: Do not use a metallic tool to open the cover.
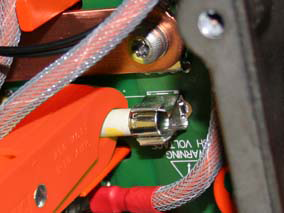
- Use a multimeter to check voltages between:
- B+ to ground
- B- to ground
- B+ and B-
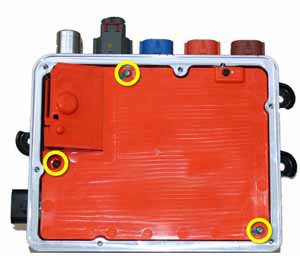
- Remove the screws (x3) that secure the plastic cover (torque 3
Nm).
- Use the fuse puller to remove the fuse.
Installation procedure is the reverse of removal.
READ NEXT:
 Forward Junction Box - 2nd Generation - 40 Amp Fuse (RWD) (Remove and
Replace)
Forward Junction Box - 2nd Generation - 40 Amp Fuse (RWD) (Remove and
Replace)
Warning: Only technicians who have been trained in High
Voltage Awareness are permitted to perform this procedure. Proper
personal protective equipment (PPE) and insulating HV gloves with a
Forward Junction Box (Dual Motor) (Remove and Replace)
Warning: Only technicians who have been trained in High
Voltage Awareness are permitted to perform this procedure. Proper
personal protective equipment (PPE) and insulating HV gloves with a
HV Junction Box - 1st Generation (Remove and Replace)
Warning: Only technicians who have been trained in High
Voltage Awareness are permitted to perform this procedure. Proper
personal protective equipment (PPE) and insulating HV gloves with a
SEE MORE:
Tire - Front - LH
Warning: Always read and
understand the tire equipment operator's manual before operating the
wheel balancer or tire changer.
Note: These instructions
are based on the Hunter TC3900 tire changer. Some steps might be
different for other tire changers. Refer to the operator's manual
Map Overview
The touchscreen displays a map at all times (except
when Model S is shifted into Reverse).
Use your finger(s) to interact with the map:
To move the map in any direction, hold and drag a
finger.
To rotate the map in any direction, hold and turn two
fingers.
To zoom the map in or out, expand
