Tesla Model S: Suspension - Front - Check Torque
- Remove the front wheels (refer to procedure).
Check the tightening torque of the following fasteners on both sides of the vehicle:
- Tie rod end to the knuckle (torque 103 Nm).
Caution: To prevent ball joint damage, always hold the ball joint pin with a wrench while loosening or tightening the lock nut.
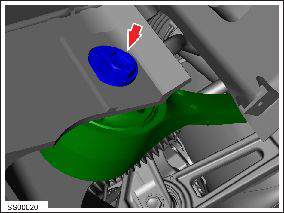
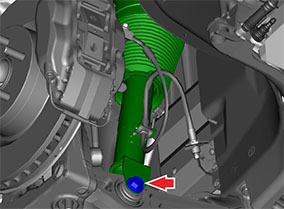
.png)
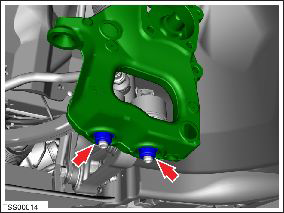
- Lower control arm ball joints to the knuckle (torque 195 Nm).
Caution: To prevent ball joint damage, always hold the ball joint pin with a wrench while loosening or tightening the lock nut.
- Reinstall the front wheels (torque 175 Nm).
- Place the vehicle on a 4-post lift (refer to procedure). Caution: Only fully tighten suspension nuts and bolts when the vehicle is on a 4-post lift and the suspension is in the ride height position.
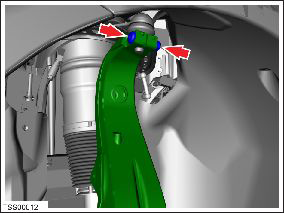
- Upper control arm ball joint to the knuckle (torque 60 Nm).
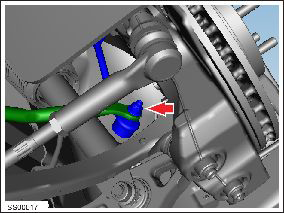
- Sway bar link to the knuckle (torque 70 Nm).
Caution: To prevent ball joint damage, always hold the ball joint pin with a wrench while loosening or tightening the lock nut.
- Sway bar to the sway bar link (torque 70 Nm).
Caution: To prevent ball joint damage, always hold the ball joint pin with a wrench while loosening or tightening the lock nut.
- Forward lower control arm to the subframe (torque 130 Nm).
- Rear lower control arm to the subframe (torque 130 Nm).
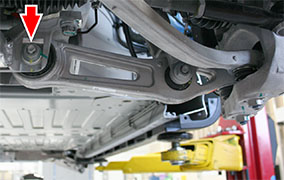
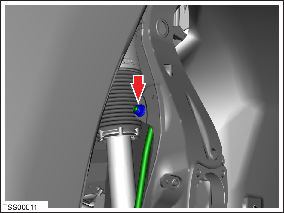
- Shock absorber to the lower control arm (torque 140 Nm).
- Remove the vehicle from the 4-post lift.
READ NEXT:
 Knuckle - Suspension - Front - LH (Remove and Replace)
Warning: If the vehicle has air suspension, activate "Jack"
mode on the touchscreen before raising and supporting the vehicle.
Removal
Remove the front hub (refer to procedure).
Hub - Front - LH (Remove and Replace)
Special tool(s) required for this procedure:
Supplier
Part Number
Description
Tesla
1062500-00-A
Magnetic F
Link - Sway Bar - Front - LH (Remove and Replace)
Warning: If the vehicle has air suspension,
activate "Jack" mode on the touchscreen before raising and
supporting the vehicle.
Removal
Loosen the front LH lug nuts (torque 175 Nm
SEE MORE:
Seal - Door Front Inner Belt - LH (Remove and Replace)
Removal
Lower door glass.
Remove door trim panel (refer to procedure)
Remove trim stud securing flap seal to door.
Carefully ease flap seal clear of inner belt seal for access.
Caution: Take care not to damage component(s).
Wind Deflector (Remove and Replace)
Removal
Remove the LH and RH wind deflector arms
(refer to procedure).
Release the wind deflector from the clips on
the deflector blade.
Removal
Installation procedure is the reverse of removal.
Caution: Ensure that the
