Tesla Model S: Door - Charge Port - Single Phase - Motorized (Remove and Replace)
Tesla Model S (2012-2026) Service Manual / High Voltage System / Door - Charge Port - Single Phase - Motorized (Remove and Replace)
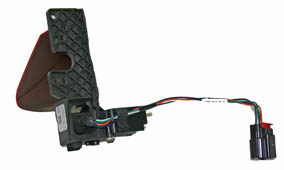
Note: The charge port door and motor are removed as an assembly.
Removal
- Remove the LH tail light assembly (refer to procedure).
- Remove the screws (x3) that secure the charge port door to the
tail light assembly (torque 2.5 Nm).
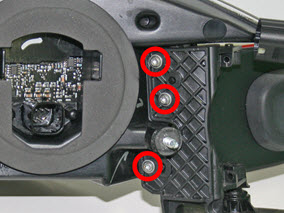
- Remove the charge port door.
Installation procedure is the reverse of removal, except for the following:
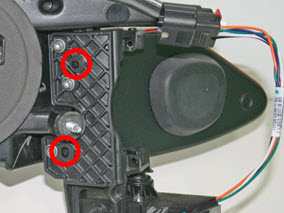
- Ensure that the studs on the tail light align with the slots on
the charge port door before installing the screws.
- Test the charge port door for proper fit and operation after the tail light is installed. Adjust the charge port door and tail light as necessary.
READ NEXT:
 Slave Charger - LH - 1st Generation (Remove and Replace)
Note: This procedure describes how to remove and install
the 1st generation slave charger. If the vehicle is equipped with a
2nd generation slave charger, refer to procedure 44102102 (refer to
Slave Charger - LH - 2nd Generation (Remove and Replace) - Removal
Note: This procedure describes how to remove and
install the 2nd generation slave charger. If the vehicle is equipped
with a 1st generation slave charger, refer to procedure 44100102 (refer
SEE MORE:
Reporting Safety Defects
Contacting Tesla
For detailed information about your Model S, go to
http://www.tesla.com and log on to your Tesla account
or sign up to get an account.
If you have any questions or concerns about your
Model S, in the United States, Canada or Puerto Rico,
call 1-877-79TESLA (1-877‑798-3752) an
Back Rest Assembly - Seat - 2nd Row - RH (Remove and Install)
Removal
Remove RH rear seat bolster (refer to procedure)
Use a pry tool to release the grommet that secures the RH 2nd
row backrest.
Pull up on the RH backrest, then pull it outwards to disconnect
it from the LH
© 2019-2026 Copyright www.tesms.org
