Tesla Model S: Drop In Center Console Assembly (Remove and Replace)
Tesla Model S (2012-2026) Service Manual / Interior trim / Drop In Center Console Assembly (Remove and Replace)
Removal
- Move the front seats to their rearmost positions to allow for additional access.
- Unplug the phone adaptor cable from the USB connector, if
installed.
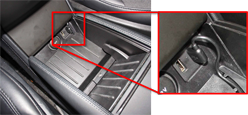
- Pull the two panels off from the sides of the center console.
Caution: Replace any broken clips.
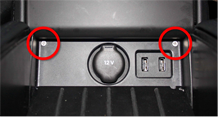
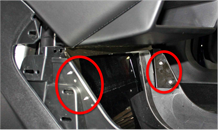
- Loosen the button head screw on each side of the console. Do not
remove the screws completely.
- Remove the screws (x2) that secure the center console to the
carrier.
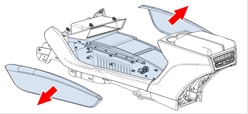
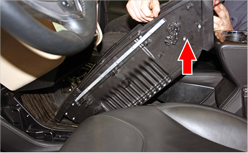
- Lift the rear of the center console up, then remove it from the
carrier.
Caution: Do not damage the arm rest while pulling the center console out of the carrier.
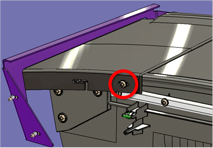
- If the mounting bracket needs to be removed, release the screws
(x4) that secure it to the carrier and remove the mounting bracket.
Installation procedure is the reverse of removal.
READ NEXT:
 2nd Row Center Console Assembly (Remove and Replace)
Removal
Fold the RH 2nd row back rest.
Loosen the 2nd row center console tether strap behind the center
seat.
Unclip the tether latch from the child seat anchor.
Center Console - 2nd Row - Executive (Remove and Replace)
Removal
Move both front seats all the way forward.
Remove the felt tray from the console.
Remove the rubber padding from the base of the console and
cupholders.
Release the sc
Finisher - Floor - Center Console (Remove and Replace)
Special tool required for this procedure:
Supplier
Part Number
Description
SEE MORE:
Footrest - Driver's (Remove and Replace)
Removal
Position driver's seat fully rearward for access.
Using a suitable trim tool release clips (x3) securing footrest
to mounting.
Remove footrest.
Installation
Installation procedu
Lifting and Jacking
Raising and supporting the vehicle
Jacking points on the Model S
Caution: Do not jack or support the vehicle on any other points
than those shown. Failure to comply will result in damage to the body or
chassis components.
Two post lift
Refer to procedure 10000205 for instru
© 2019-2026 Copyright www.tesms.org
