Tesla Model S: Exterior Release Switch - Liftgate (Remove and Replace)
Tesla Model S (2012-2026) Service Manual / Closures / Exterior Release Switch - Liftgate (Remove and Replace)
Removal
- Open the liftgate to a suitable working height.
- Remove the applique from the liftgate (refer to procedure). Caution: Take care not to damage component(s). Caution: Protect paintwork from possible damage during this procedure.
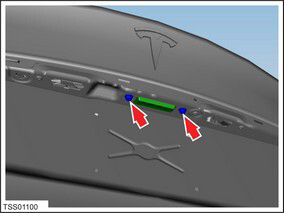
- Remove the bolts (x2) that secure the switch housing to the
liftgate (torque 3 Nm).
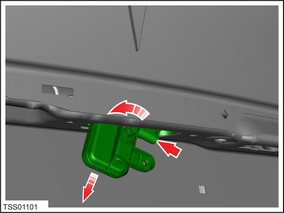
- Release the switch and housing from the liftgate, then rotate
and disconnect the harness connector.
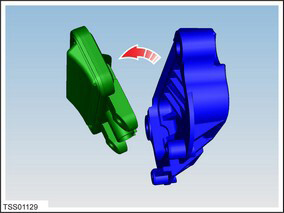
- Remove the screws (x2) that secure the liftgate switch to the
housing and remove the switch.
Installation procedure is the reverse of removal.
READ NEXT:
 Door Assembly - Front - LH (Remove and Replace)
Removal
Position vehicle with clear access to door assembly.
Remove sill panel trim (refer to procedure)
Disconnect door harness connectors (x3) from dash wiring
harness.
Supp
Latch - Door - Front - LH (Remove and Replace)
Removal
Remove front door trim panel (refer to procedure)
Remove screws (x2) securing door latch assembly to reinforcement
(torque 10 Nm).
Latch - Door - Rear - LH (Remove and Replace)
Removal
Remove the rear seat cushion frame (refer to procedure).
Remove the rear sill trim panel (refer to procedure).
Release the carpet and sound insulation from the rear seat
m
SEE MORE:
Managing Keys
To display a list of all keys (phone keys, key cards, and key fobs) that can
access your Model S, touch Controls > Locks. An icon displays next to each key
to indicate whether the key is a phone key, key card, or key fob. Use this list
to manage keys that have access to your Model S. To add or
Park Brake Caliper - Release - Harness Tool - Through ECU
Special Tools Required:
1030924-00-A EPB RELEASE TOOL, HARNESS
1030925-00-A ASY, RELEASE TOOL, EPB CONTROLLER REWORK
Chock the front wheels.
Remove the RH rear trunk trim
(refer to procedure).
Disconnect the harness from the top port of the
electric p
© 2019-2026 Copyright www.tesms.org
