Tesla Model S: Latch - Door - Front - LH (Remove and Replace)
Tesla Model S (2012-2026) Service Manual / Closures / Latch - Door - Front - LH (Remove and Replace)
Removal
- Remove front door trim panel (refer to procedure)
- Remove screws (x2) securing door latch assembly to reinforcement
(torque 10 Nm).
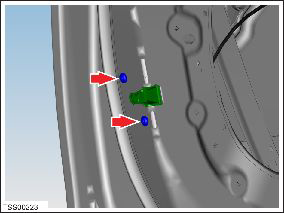
- Carefully release latch assembly from door outer panel and disconnect latch harness connector. Caution: Take care not to damage component(s).
- Remove latch assembly and release cable from door.
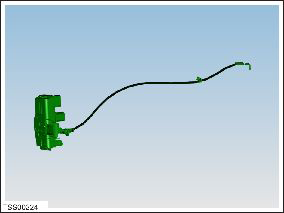
- Disconnect latch release cable from latch assembly.
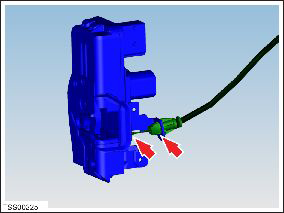
- Disconnect wiring harness connector.
Installation procedure is the reverse of removal.
READ NEXT:
 Latch - Door - Rear - LH (Remove and Replace)
Removal
Remove the rear seat cushion frame (refer to procedure).
Remove the rear sill trim panel (refer to procedure).
Release the carpet and sound insulation from the rear seat
m
Striker - Door - Front - LH (Remove and Replace)
Removal
Open door.
Remove countersunk screws (x2) securing striker plate to 'B'
pillar (torque 22 Nm).
Note: Note installed position of components before
removal.
Striker - Door - Rear - LH (Remove and Replace)
Removal
Open door.
Remove countersunk screws (x2) securing striker plate to rear
door (torque 22 Nm).
Note: Note installed position of components before
removal.
SEE MORE:
Hub - Front - LH (Remove and Replace)
Special tool(s) required for this procedure:
Supplier
Part Number
Description
Tesla
1062500-00-A
Magnetic Field Viewing Card
Tesla
1082171-00-A
S-hook
Warning: If
LF Antenna - Center - Rear (Remove and Replace)
Warning: If the vehicle has air suspension, activate "Jack"
mode on the touchscreen before raising and supporting the vehicle.
Removal
Raise and support the vehicle (refer to procedure)
Warning: Do not work on an incorrectly supported vehicle.
Wa
© 2019-2026 Copyright www.tesms.org
