Tesla Model S: Front Reading (Dome) Lights (Remove and Replace)
Tesla Model S (2012-2026) Service Manual / Electrical / Front Reading (Dome) Lights (Remove and Replace)
Removal and Install
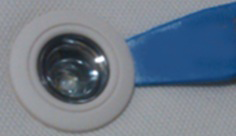
- Use a trim stick to remove the front dome light bezels. Discard
the bezels.
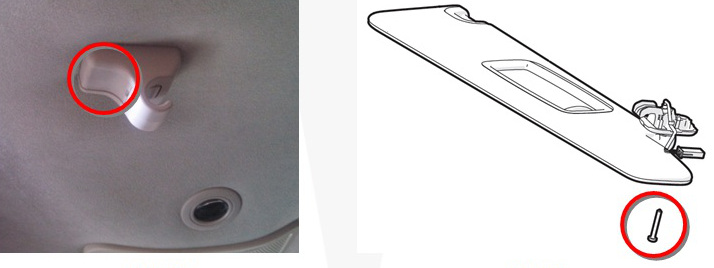
- Release the screw cover from each sun visor center retaining
block and remove the screw.
- Remove the rear view mirror cover (refer to procedure)
- Release the front of the exterior overhead console and pull
downward.
Caution: Do not damage the harness connections on the inside of the overhead console.
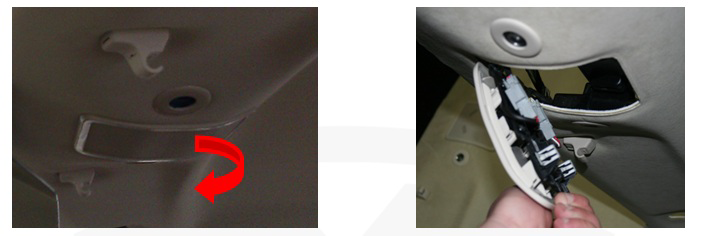
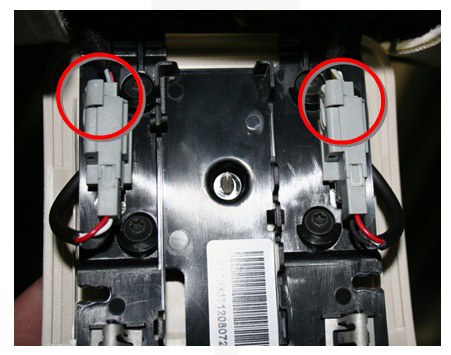
- Disconnect the 2 harness connections from the inside of the
overhead console.
- Remove the exterior overhead console.
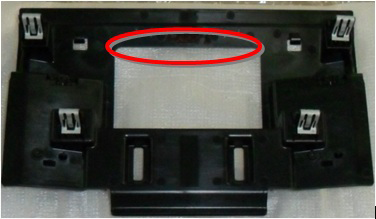
- Reach into the cavity and pull down sharply on the front of the
interior overhead console to release the 4 trim clips
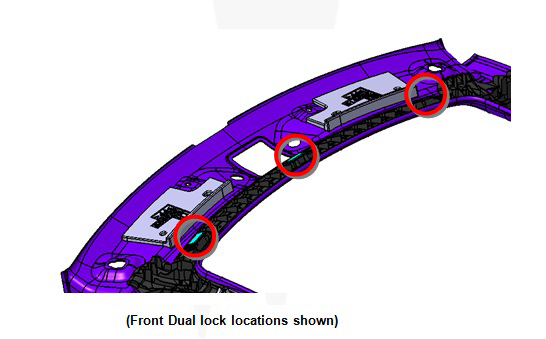
- Lower the front of the headliner. If the vehicle has a panoramic
roof, release the 3 dual locks.
Caution: Do not damage the harness connections on the interior overhead console.
- Release all harness connections from the interior overhead console.
- Remove the interior overhead console.
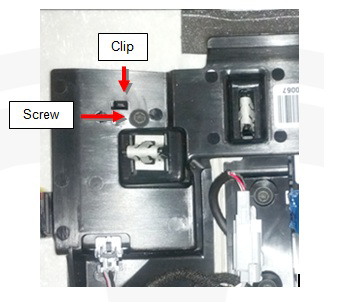
- Remove the dome light assemblies by releasing the screw and clip
that secure each assembly to the interior overhead console.
- Inspect the new dome light assemblies. Remove any tape. Ensure that the lights are clear and free of contaminants. If the lights are not clean, replace them.
- Attach the new dome light assemblies to the interior overhead console and secure them with screws.
- Reconnect all harnesses.
- Turn the lights on and off 3 times. If the lights fail, or do not produce an audible click when pressed, replace the dome light assemblies.
- Reinstall the interior overhead console.
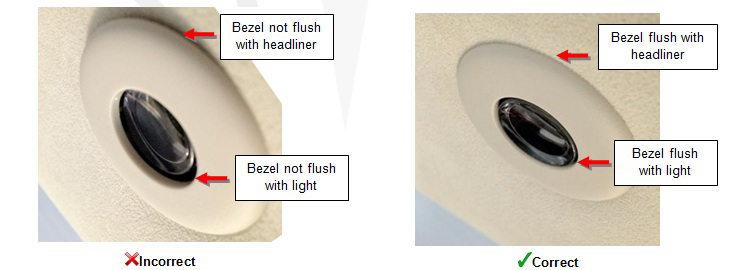
- Attach the new dome light bezels by supporting the back of the
dome light assemblies and snapping the bezels firmly into place over
the headliner. The bezels fit flush with the headliner and light.
Caution: The bezels are one time use parts. Do not remove the bezel after attaching it to the assembly. This destroys the bezel.
- Installation procedure is the reverse of removal.
READ NEXT:
 Rear Reading (Dome) Lights (Remove and Replace)
Removal and Install
Use a trim stick to remove the rear dome light bezels. Discard
the bezels.
Note: If the vehicle does not have a panoramic
roof, skip to step 5.
Headlight - Adjust - North America
North America (SAE)
Prepare a work area for adjusting the headlights:
The area is darkened.
The ground is flat and level.
There is a wall with a white matte s
Headlight - Adjust - Europe
Europe (ECE)
Position the vehicle for adjusting the headlights:
The vehicle is in a darkened area.
The vehicle is on a level surface.
The vehicle is perpendic
SEE MORE:
Maintenance
Software
Updating software is important to ensure proper
operation and longevity of your vehicle's components.
You must install a software update at the earliest
opportunity. See Software Updates.
Tesla may update or reinstall your vehicle's software as
part of the normal diagnostic, repair, an
Module - Body Controller - BCM (Remove and Replace)
Warning: If the 12V power supply is disconnected, do
not attempt to open any doors with door glass in closed position.
Failure to follow this instruction could result in door glass
shatter.
Note: Before disconnecting the 12V power supply,
ensure that the driver's door window
© 2019-2026 Copyright www.tesms.org
