Tesla Model S: Striker - Door - Front - LH (Remove and Replace)
Tesla Model S (2012-2026) Service Manual / Closures / Striker - Door - Front - LH (Remove and Replace)
Removal
- Open door.
- Remove countersunk screws (x2) securing striker plate to 'B'
pillar (torque 22 Nm).
Note: Note installed position of components before removal.
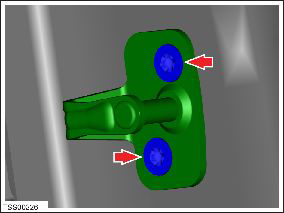
- Remove door striker.
Installation procedure is the reverse of removal, except for the following:
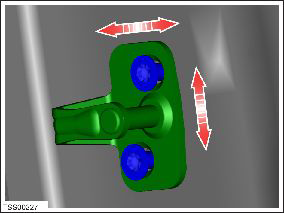
Adjust
Check and adjust door to body as required.
READ NEXT:
 Striker - Door - Rear - LH (Remove and Replace)
Removal
Open door.
Remove countersunk screws (x2) securing striker plate to rear
door (torque 22 Nm).
Note: Note installed position of components before
removal.
Handle - Interior Release - Door - Front - LH (Remove and Replace)
Removal
Remove front door trim panel (refer to procedure)
Release clips and remove door pad finisher.
Caution: Take care not to damage component(s).
Handle - Interior Release - Door - Rear - LH (Remove and Replace)
Removal
Remove the rear door trim panel (refer to procedure).
Remove the screws (x3) and the nut (x1) that secure the interior
door handle to the trim pad (torque 3 Nm).
SEE MORE:
Target Calibration - Forward Facing Camera
Special tool required for this procedure:
Supplier
Part Number
Description
Tesla
1053066-00-A
Camera Calibration Target
Note: If the
Fascia Assembly - Front (Remove and Replace)
Removal
Remove the front fascia (refer to procedure).
Remove the front fascia applique:
If the vehicle has the 1st generation front fascia applique,
refer to procedure.
If the vehicle has the 2nd generation front fascia applique,
refer to procedure.
© 2019-2026 Copyright www.tesms.org
