Tesla Model S: Power Socket 12V - Center Console - Rear (Remove and Replace)
Tesla Model S (2012-2026) Service Manual / Electrical / Power Socket 12V - Center Console - Rear (Remove and Replace)
Removal
- Power driver's seat fully forward for access.
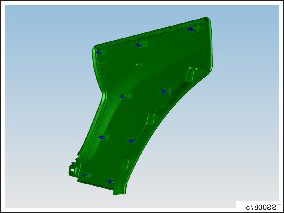
- Release clips (x10) securing driver's side upper center console
trim to substrate.
.png)
- Carefully release clips (x8) securing center console end closing
trim to substrate. Position trim aside, do not disconnect wiring
harness.
Caution: Take care not to damage component(s).
Caution: Replace any broken clips.
.png)
- Carefully release clips (x9) securing driver side center console
rear trim.

- Remove bolts (x2) securing rear end of center console to body.
.png)
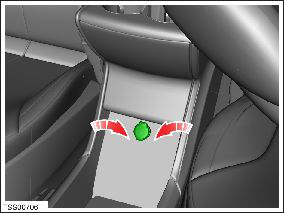
- Using a suitable tool carefully release power socket from
console.
Caution: Protect surrounding trim from damage during this procedure.

- Carefully raise rear end of center console for access to power socket harness connector, support raised end on suitable wedge.
- Access power socket harness connector adjacent to driver side at rear edge of center console, disconnect harness connection and attach a tether line to power socket harness.
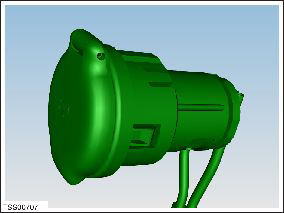
- Remove power socket, pull harness through center console.
Disconnect harness but do not remove tether.

- To install new power socket, attach harness connector to tether.
- Installation procedure is the reverse of removal, except for the following.
- Using attached tether pull power socket wiring harness through center console, disconnect tether and connect harness connector.
READ NEXT:
 Switch Pack - Driver's (Remove and Replace)
Removal
Remove driver's side door trim (refer to procedure)
Move acoustic pad aside to access door trim.
Caution: Take care not to damage component(s).
 Switch - Window Lift - Front Passenger's (Remove and Replace)
Removal
Remove passenger door trim. Removal of passenger door trim is
similar to driver's door (refer to procedure)
Move acoustic pad aside to access door trim.
Caution: T
 Switch - Window Lift - LH - Rear (Remove and Replace)
Removal
Remove LH rear door panel (refer to procedure)
Move acoustic pad aside to access door trim.
Caution: Take care not to damage component(s).
SEE MORE:
 Handle - Exterior Release - Door - Front - LH (Remove and Replace)
Removal
Remove regulator assembly (refer to procedure)
Make sure exterior release handle is fully retracted.
Disconnect handle harness connector.
Remove nuts (x4) securing door release assembly to reinforcement
(torque 9 Nm).
Carefully release door handle assembly from d
 Powertrain Coolant Pump 2 (Remove and Replace)
Coolant pump locations:
RWD Model S
Dual Motor Model S
1
Powertrain coolant pump 1
RWD vehicle
2
Battery coolant pump 2
RWD vehicle
3
Battery coolant pump 1
RWD vehicle
© 2019-2026 Copyright www.tesms.org

