Tesla Model S: Switch Pack - Driver's (Remove and Replace)
Tesla Model S (2012-2026) Service Manual / Electrical / Switch Pack - Driver's (Remove and Replace)
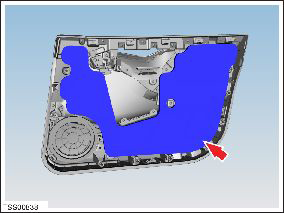
Removal
- Remove driver's side door trim (refer to procedure)
- Move acoustic pad aside to access door trim.
Caution: Take care not to damage component(s).
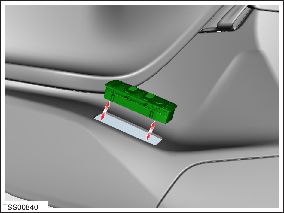
- Remove screws (x4) securing switch pack assembly to door trim
bracket (torque 1 Nm).
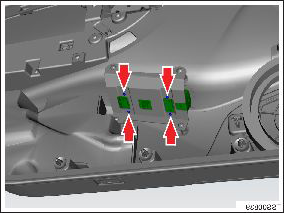
- Release switch pack from door pad.
Installation procedure is the reverse of removal.
READ NEXT:
 Switch - Window Lift - Front Passenger's (Remove and Replace)
Removal
Remove passenger door trim. Removal of passenger door trim is
similar to driver's door (refer to procedure)
Move acoustic pad aside to access door trim.
Caution: T
Switch - Window Lift - LH - Rear (Remove and Replace)
Removal
Remove LH rear door panel (refer to procedure)
Move acoustic pad aside to access door trim.
Caution: Take care not to damage component(s).
Switches - Steering Wheel (Remove and Replace)
Removal
Remove the driver's air bag Air bag - Driver's (Remove and
Replace).
Place the driver's air bag assembly on a soft clean surface with
the backside of the bezel facing up.
SEE MORE:
Frame - Seat Back - 2nd Row Seat - LH (Remove and Replace)
Removal
Remove Rear LH seat back rest assembly and remove Pivot lock
from outboard side of assembly (refer to procedure)
Release and remove latch cover from seat back.
Release cover from seat back frame.
Remove
Interior Emergency Release
An illuminated interior release button inside the front
trunk allows a person locked inside to get out.
Press the interior release button to open the front trunk,
then push up on the hood.
NOTE: The interior release button glows following a brief
exposure to ambient light.
WARNING: People shou
© 2019-2026 Copyright www.tesms.org
