Tesla Model S: Switch - Window Lift - Front Passenger's (Remove and Replace)
Tesla Model S (2012-2026) Service Manual / Electrical / Switch - Window Lift - Front Passenger's (Remove and Replace)
Removal
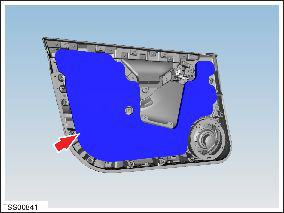
- Remove passenger door trim. Removal of passenger door trim is similar to driver's door (refer to procedure)
- Move acoustic pad aside to access door trim.
Caution: Take care not to damage component(s).
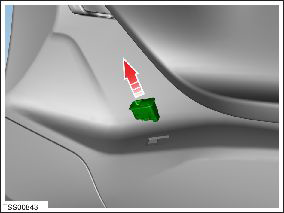
- Remove screw securing window lift switch to door trim.

- Release switch from bracket and remove from door trim.
Installation procedure is the reverse of removal.
READ NEXT:
 Switch - Window Lift - LH - Rear (Remove and Replace)
Removal
Remove LH rear door panel (refer to procedure)
Move acoustic pad aside to access door trim.
Caution: Take care not to damage component(s).
Switches - Steering Wheel (Remove and Replace)
Removal
Remove the driver's air bag Air bag - Driver's (Remove and
Replace).
Place the driver's air bag assembly on a soft clean surface with
the backside of the bezel facing up.
Front Reading (Dome) Lights (Remove and Replace)
Removal and Install
Use a trim stick to remove the front dome light bezels. Discard
the bezels.
Release the screw cover fr
SEE MORE:
Standby Mode
To keep Model S ready to Summon and reduce the time
it takes to warm up, turn on Standby Mode. Touch
Controls > Autopilot > Standby Mode. When Standby
Mode is turned on, you can conserve Battery energy by
disabling Standby Mode at these locations:
Exclude Home - Disables Standby Mode at
Control Arm Assembly - Rear - Lower - LH (Remove and Replace)
Warning: If the vehicle has air suspension, activate "Jack"
mode on the touchscreen before raising and supporting the vehicle.
Removal
Loosen the front LH lug nuts.
Raise and support the vehicle (refer to procedure)
Remove road wheel (refer to procedure)
Remove mid
© 2019-2026 Copyright www.tesms.org
