Tesla Model S: Switch - Window Lift - LH - Rear (Remove and Replace)
Tesla Model S (2012-2026) Service Manual / Electrical / Switch - Window Lift - LH - Rear (Remove and Replace)
Removal
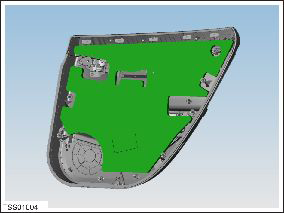
- Remove LH rear door panel (refer to procedure)
- Move acoustic pad aside to access door trim.
Caution: Take care not to damage component(s).
- Remove screws (x3) securing window lift switch surround to door
trim.
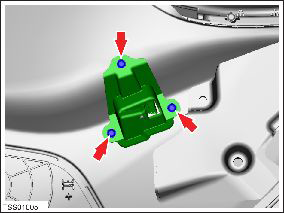
- Release switch from door panel and remove switch.
Installation procedure is the reverse of removal.
READ NEXT:
 Switches - Steering Wheel (Remove and Replace)
Removal
Remove the driver's air bag Air bag - Driver's (Remove and
Replace).
Place the driver's air bag assembly on a soft clean surface with
the backside of the bezel facing up.
Front Reading (Dome) Lights (Remove and Replace)
Removal and Install
Use a trim stick to remove the front dome light bezels. Discard
the bezels.
Release the screw cover fr
Rear Reading (Dome) Lights (Remove and Replace)
Removal and Install
Use a trim stick to remove the rear dome light bezels. Discard
the bezels.
Note: If the vehicle does not have a panoramic
roof, skip to step 5.
SEE MORE:
Driveshaft Assembly - Front - RH (Remove and Replace)
Warning: If the vehicle has air suspension, activate "Jack"
mode on the touchscreen before raising and supporting the vehicle.
Removal
Remove the RH front wheel (refer to procedure).
While having an assistant press the brake pedal, loosen the RH
front axle nut, but do n
Back Rest Assembly - 2nd Row - Executive (Remove and Replace)
Removal
Remove the LH and RH lower seat cushions (refer to procedure).
On each side of the vehicle, remove the screw that secures the
closeout panel to the seat frame (torque 5 Nm). Remove the panel
from the vehicle.
© 2019-2026 Copyright www.tesms.org
