Tesla Model S: Side Applique - 1st Generation - LH (Remove and Replace)
Tesla Model S (2012-2026) Service Manual / Roof / Side Applique - 1st Generation - LH (Remove and Replace)
Warning: To avoid personal injury, wear cut-resistant gloves when performing this operation.
Special tools required for this procedure:
| Supplier | Part Number | Description |
| Tesla | 1078739-00-A | Equalizer Hydroblade Tool |
- Apply painter's tape to protect the external bodywork.
- Place suitable covers over the remaining paint and bodywork.
-
Starting at the rear and working forward, use a
hydroblade tool to carefully cut through the adhesive and remove the
side applique.
Caution: Protect the interior trim from possible damage.
Caution: Do not damage the surrounding trim.
Note: The applique has a lip that locates it under the windshield.

- Use a scraping tool to remove the majority of the adhesive from the body, leaving a smooth layer of the original adhesive approximately 1 mm thick or less to aid assembly.
- Vacuum any debris around the roof frame area.
- Wipe all of the sealing surfaces with isopropyl alcohol (IPA) or with alcohol wipes.
- Apply primer to all adhesive paths on the body and the applique, and on any bare metal on the body opening. Caution: Check the expiration date of the primer and adhesive before use. Caution: Check the primer and adhesive packaging for the appropriate working times for each product. Prepare the necessary tools and work environment so that the the frame can be installed within the specified working times. Note: The procedures requires approximately 1 tube of adhesive.
- Assemble the adhesive applicator.
- Cut the tip of the adhesive applicator so that it will produce a bead 8 mm (5/16 in) wide and 14 mm (9/16 in) high.
-
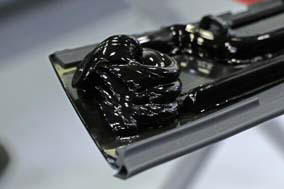
Apply adhesive to the applique in the pattern
shown.
Note: At the front inboard corner of the applique, apply the adhesive in a circular motion with a decreasing diameter to form a spiral approximately 2-3/8 in (60 mm) wide and 3-1/8 in (80 mm) high.

- Place the applique on the body. Position the front edge at the edge of the front applique and position the rear edge so that it is flush with the rear edge of the fixed glass. Press the side applique into place. Note: Check the adhesive packaging for the appropriate working time.
- Check for appropriate gaps and flushness, and adjust the applique as required. Note: Clean off any excess adhesive from body.
- Apply adhesive tape to secure the applique while the adhesive cures.
- Remove the protective covers.
READ NEXT:
 Side Applique - 2nd Generation - LH (Remove and Replace)
Removal
Partially raise the liftgate to access the back
of the applique.
Pull up on the back of the applique to release
the clips and remove the applique.
Add a ma
Front Applique - 1st Generation (Remove and Replace)
Warning: To
avoid personal injury, wear cut-resistant gloves when performing
this operation.
Special tools required for this procedure:
Supplier
Panoramic Roof Drive Cable - LH (Remove and Replace)
Removal
Remove the panoramic roof sliding glass
(refer to procedure).
Remove the LH sunroof motor
(refer to procedure).
Note: If
performing t
SEE MORE:
Battery Chiller and TXV Assembly (Remove and Replace)
Warning: If the 12V power supply is disconnected, do
not attempt to open any doors with door glass in closed position.
Failure to follow this instruction could result in door glass
shatter.
Note: Before disconnecting the 12V power supply,
ensure that the driver's door window
Fascia Assembly - Front (Remove and Install)
Warning: If the vehicle has air suspension, activate "Jack"
mode on the touchscreen before raising and supporting the vehicle.
Removal
Remove the front underhood apron (refer to procedure).
Remove the plastic rivets (x8) that secure the undershield to
the chin spoiler.
© 2019-2026 Copyright www.tesms.org
