Tesla Model S: Panoramic Roof Drive Cable - LH (Remove and Replace)
Tesla Model S (2012-2026) Service Manual / Roof / Panoramic Roof Drive Cable - LH (Remove and Replace)
Removal
- Remove the panoramic roof sliding glass (refer to procedure).
- Remove the LH sunroof motor (refer to procedure). Note: If performing this procedure on the RH side, remove the RH sunroof motor (refer to procedure)
- Remove the side applique (refer to procedure).
- Remove the fixed glass (refer to procedure).
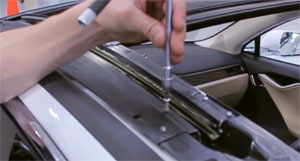
-
Remove the stop screw at the rear of the roof
track.

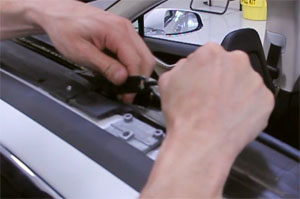
-
Place a cable tie through the hole in the rear
link, then pull the rear link towards the rear of the vehicle in
order to release it from the roof track.

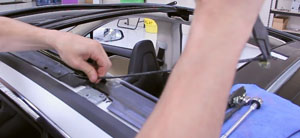
-
Use pliers or a similar a tool to pull the
cable out of the vehicle. Completely remove the cable.

Examine all grease on the cable for contamination such as dirt, sand, or debris. If any contamination is present, remove all grease and apply new grease.
-
Place the bullet end of the cable into the
guide tube and route the cable into the roof track, leaving enough
room at the end of the cable to secure the rear link to the shoe.
Caution: Apply lubrication to all surfaces.
Caution: If the shoe is worn or damaged, replace it.

- Secure the link to the shoe.
- Move the link and cable through their full range of motion to ensure that it can move freely.
- Install the rear stop screw.
- Move the link to its rearmost position.
- Install all components that were removed for access.
- Perform a panoramic roof calibration (refer to procedure).
READ NEXT:
 Wind Deflector Arm - LH (Remove and Replace)
Removal
The wind deflector arm is part of an assembly that
includes the wind deflector arm, wind deflector spring, and pivot
block.
Fully open the panoramic roof
 Wind Deflector (Remove and Replace)
Removal
Remove the LH and RH wind deflector arms
(refer to procedure).
Release the wind deflector from the clips on
the deflector blade.
 Motor - Sunroof - LH (Remove and Replace)
Removal
If the vehicle is equipped with premium audio,
remove the premium boost amplifier module
(refer to procedure).
Disconnect the sunroof motor harness connector.
SEE MORE:
 Tire Pressure Monitoring
Each tire should be checked monthly when cold and
inflated to the recommended pressures that are printed
on the Tire and Loading Information label located on the
driver's door pillar (see Maintaining Tire Pressures). If your vehicle has tires of a different size than
the size indicated on the ve
 Sun Visor - Driver's (Remove and Replace)
Removal
Use a trim stick or other non-marring pry tool to release the
visor mounting cover.
Caution: Take care not to damage component(s).
Remove the screw that secures the sun visor to the roof.
Re
© 2019-2026 Copyright www.tesms.org

