Tesla Model S: Trim - 'B' Post - Upper - LH (Remove and Install)
Tesla Model S (2012-2026) Service Manual / Interior trim / Trim - 'B' Post - Upper - LH (Remove and Install)
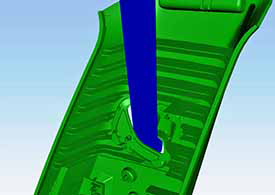
Removal
- Remove the LH lower 'B' post trim (refer to procedure).
- Carefully release the clips (x4) that secure the 'B' post upper trim to the body by gently pulling the lower edge away from the body and releasing the top alignment dowel. Caution: Take care not to damage component(s).
- Allow the 'B' post upper trim to rest on the seat belt buckle.
Installation procedure is the reverse of removal.
READ NEXT:
 Trim - 'B' Post - Upper - LH (Remove and Replace)
Removal
Remove the LH lower 'B' post trim (refer to procedure).
Remove the plastic trim that covers the seat belt fixing on the
driver's seat.
Trim - 'B' Post - Lower - LH (Remove and Install)
Removal
Power the seat forward to gain access to the 'B' post.
Carefully release the leading edge of the rear rocker panel trim
for access.
Caution: Take car
Trim - 'C' Post Upper - LH (Remove and Replace)
Removal
Open LH rear door.
Fold rear seat back forward for access.
Using a suitable tool carefully release clips (x4) securing 'C'
post trim to body.
Caution: Take car
SEE MORE:
Cannot charge - Charge handle temperature high
Check charge handle or charge port for debris
Charging has been interrupted because the Mobile Connector has detected a
high temperature in the charge handle
that connects to your vehicle's charge port.
Make sure the Mobile Connector is fully inserted into your vehicle's charge port
inlet.
You
Motor - Door - Exterior Handle - Rear - LH (Remove and Replace)
Removal
Remove door handle for access (refer to procedure)
Position handle assembly on a soft working surface.
Remove door handle rear seal.
Remove cable ties securing door pressure sensor and motor
wiring.
Release motor wiring connector.
Remove screws (x4) securing
© 2019-2026 Copyright www.tesms.org
