Tesla Model S: Trim - 'C' Post Upper - LH (Remove and Replace)
Tesla Model S (2012-2026) Service Manual / Interior trim / Trim - 'C' Post Upper - LH (Remove and Replace)
Removal
- Open LH rear door.
- Fold rear seat back forward for access.
- Using a suitable tool carefully release clips (x4) securing 'C'
post trim to body.
Caution: Take care not to damage component(s).
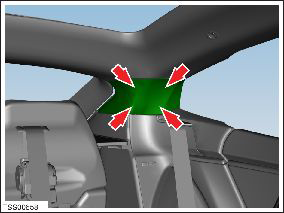
- Carefully release trim from interlocking lugs (x3).
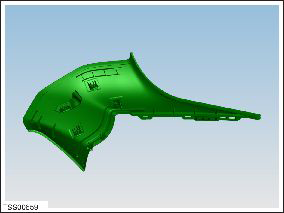
- Remove 'C' post trim.
Installation procedure is the reverse of removal.
READ NEXT:
 Trim - 'C' Post Rear - LH (Remove and Replace)
Removal
Remove the parcel shelf, if equipped.
If the LH C-Pillar rear trim panel has a liftgate switch, reach
behind the C-pillar rear trim panel and push the switch out from the
Trim - Sill Panel - LH - Rear (Remove and Replace)
Removal
Remove the 'C' post LH rear trim (refer to procedure).
Remove the 'C' post LH upper trim (refer to procedure).
Fold the 2nd row seat backrests all the way forward.
Remove
Footrest - Driver's (Remove and Replace)
Removal
Position driver's seat fully rearward for access.
Using a suitable trim tool release clips (x3) securing footrest
to mounting.
SEE MORE:
Face Level Vent - Front Passenger's - Inner (Remove and Replace)
Removal
Remove RH instrument panel finisher assembly (refer to
procedure)
Remove screws (x3) securing passenger inner face vent to trim
(torque 1 Nm).
Remove vent from trim.
Installation
Installation p
Actuator - Pedestrian Protection - LH (Remove and Replace)
Warning: If the 12V power supply is disconnected, do
not attempt to open any doors with door glass in closed
position. Failure to follow this instruction could result in
door glass shatter.
Note: Before disconnecting the 12V power supply,
ensure that the driver's door window
© 2019-2026 Copyright www.tesms.org
