Tesla Model S: Trim - Sill Panel - LH - Rear (Remove and Replace)
Tesla Model S (2012-2026) Service Manual / Interior trim / Trim - Sill Panel - LH - Rear (Remove and Replace)
Removal
- Remove the 'C' post LH rear trim (refer to procedure).
- Remove the 'C' post LH upper trim (refer to procedure).
- Fold the 2nd row seat backrests all the way forward.
- Remove the LH rear seat side bolster (refer to procedure).
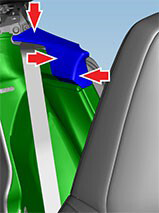
- Release the clips that secure the 'C' post middle trim.
- Use a trim tool to remove the 'C' post middle trim.
Caution: Take care not to damage component(s).
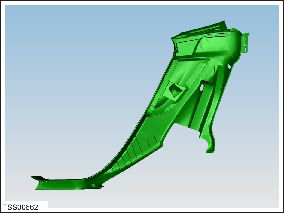
Note: Components have been removed in this graphic to aid clarity.
- Release the 'C' post lower trim panel by releasing the trim
clips, starting from the 'B' post and working towards the rear of
the vehicle:
Caution: Take care not to damage component(s).
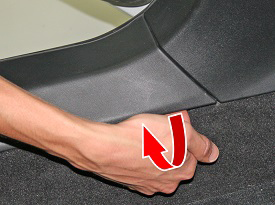
- Pull inboard and lift the front lower edge of the trim panel
to release the hook from the 'B' post.
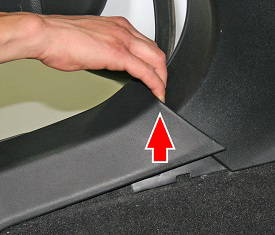
- Pull straight up at the edge closest to the 'B' post to
release the clip.
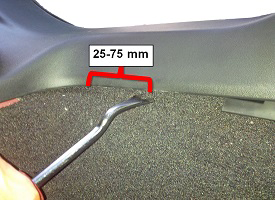
- Insert a trim removal tool as shown, 1-3 in (25-75 mm) from
the corner of the sill panel and gently pull upwards to release
the clip.
- Remove the 'C' post lower trim panel from the vehicle.
- Pull inboard and lift the front lower edge of the trim panel
to release the hook from the 'B' post.
Installation procedure is the reverse of removal, except for the following:
Caution: Replace any broken clips.
READ NEXT:
 Footrest - Driver's (Remove and Replace)
Removal
Position driver's seat fully rearward for access.
Using a suitable trim tool release clips (x3) securing footrest
to mounting.
Assembly - Closeout Extension - LH - Center Console (Remove and Replace)
Removal
Remove LH wrapped panel trim (refer to procedure)
Remove mat from footwell.
Release clips (x8) and adhesive pad (x1) securing closeout
extension to console.
Ca
Cup Holder (Remove and Replace)
Removal
Remove center console assembly (refer to procedure)
Position center console on suitable clean bench to prevent
damage.
Caution: Take care not to damage component(s
SEE MORE:
Brake Caliper - Rear - LH (Remove and Replace)
Warning: If the vehicle
has air suspension, activate "Jack" mode on the touchscreen before
raising and supporting the vehicle.
Removal
Remove the rear underhood apron
(refer to procedure).
Remove the brake fluid reservoir cap and place
an absorbent materi
Lamps - Fog - Front - Adjust
Position the vehicle for adjusting the fog lamps:
In a darkened area.
On a level surface.
Perpendicular to a wall that has a matte white
surface. The wall must be at least 3.7 m (12 ft) wide
and 1.87 m (6 ft) high.
The fog lamps are 10 m
© 2019-2026 Copyright www.tesms.org
