Tesla Model S: Trim - 'C' Post Rear - LH (Remove and Replace)
Tesla Model S (2012-2026) Service Manual / Interior trim / Trim - 'C' Post Rear - LH (Remove and Replace)
Removal
- Remove the parcel shelf, if equipped.
- If the LH C-Pillar rear trim panel has a liftgate switch, reach
behind the C-pillar rear trim panel and push the switch out from the
back. If not, skip to step 4.
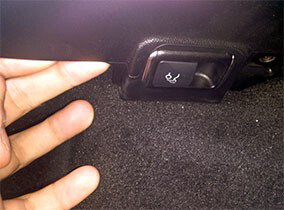
- Disconnect the wiring harness that is attached to the liftgate switch.
- Remove the screw (torque 3 Nm).
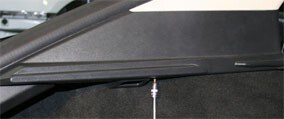
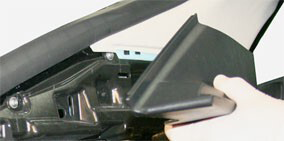
- Remove the trim panel by releasing the trim clips.
Installation procedure is the reverse of removal.
READ NEXT:
 Trim - Sill Panel - LH - Rear (Remove and Replace)
Removal
Remove the 'C' post LH rear trim (refer to procedure).
Remove the 'C' post LH upper trim (refer to procedure).
Fold the 2nd row seat backrests all the way forward.
Remove
Footrest - Driver's (Remove and Replace)
Removal
Position driver's seat fully rearward for access.
Using a suitable trim tool release clips (x3) securing footrest
to mounting.
Assembly - Closeout Extension - LH - Center Console (Remove and Replace)
Removal
Remove LH wrapped panel trim (refer to procedure)
Remove mat from footwell.
Release clips (x8) and adhesive pad (x1) securing closeout
extension to console.
Ca
SEE MORE:
Front Drive Unit (From Below) (Remove and Replace)
Special tool required for this procedure:
Supplier
Part Number
Description
Tesla
1056361-00-A
Oberg
Tilt-Lift
Removal
Master Cylinder (Remove and Replace)
Note: This procedure
applies to vehicles with the vacuum brake booster only. If the
vehicle has the electromechanical brake booster assembly, the
master cylinder is part of the brake booster assembly. Refer to
procedure 33031402
(refer to procedure).
Removal
© 2019-2026 Copyright www.tesms.org
