Tesla Model S: 3 Way Coolant Valve - Chiller Bypass (Remove and Replace)
Tesla Model S (2012-2026) Service Manual / Thermal Management / 3 Way Coolant Valve - Chiller Bypass (Remove and Replace)
Warning: If the vehicle has air suspension, activate "Jack" mode on the touchscreen before raising and supporting the vehicle.
Warning: If the 12V power supply is disconnected, do not attempt to open any doors with door glass in closed position. Failure to follow this instruction could result in door glass shatter.
Note: Before disconnecting the 12V power supply, ensure that the driver's door window is fully open. Failure to follow this instruction could result in vehicle lockout.
Removal
- Raise and support the vehicle (refer to procedure).
- Disconnect 12V power.
- Rear wheel drive (RWD): Refer to procedure.
- Dual Motor: Refer to procedure.
- Remove the underhood storage unit for access (refer to procedure).
- Position a container to collect the coolant.
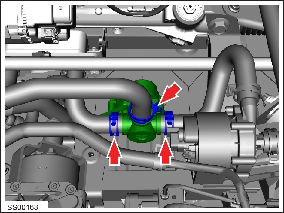
- Clamp the feed and return coolant hoses (x3).
- Release the clips (x3) that secure the coolant hoses to the
coolant valve. Release the hoses from the valve.

- Disconnect the coolant valve connector.
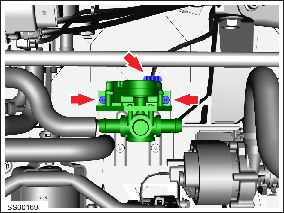
- Remove the bolts (x2) that secure the coolant valve to the
bracket (torque 5 Nm).

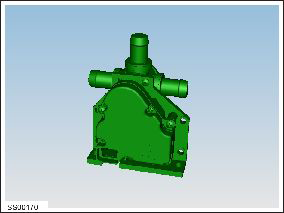
- Remove the coolant valve.

- Installation procedure is the reverse of removal, except for the following: Warning: Only use cleaning agents and solvents in a well-ventilated area. Note: Clean the affected areas before installation.
- Refill and bleed the cooling system (refer to procedure).
READ NEXT:
 3 Way Coolant Valve - Radiator Bypass (Remove and Replace)
Warning: If the 12V power supply is disconnected, do
not attempt to open any doors with door glass in closed position.
Failure to follow this instruction could result in door glass
shat
 4 Way Coolant Valve - Series/Parallel (Remove and Replace)
Warning: If the vehicle has air suspension, activate "Jack"
mode on the touchscreen before raising and supporting the vehicle.
Warning: If the 12V power supply is
disconnected, do not att
 Coolant Heater - Electric - Battery - 1st Generation (Remove and Replace)
Warning: Only technicians who have been trained in High
Voltage Awareness are permitted to perform this procedure. Proper
personal protective equipment (PPE) and insulating HV gloves with a
SEE MORE:
 Seat Cushion - Lower - 2nd Row - Executive - LH (Remove and Replace)
Removal
Remove the 2nd row center console (refer to procedure).
Use both hands to firmly pull up on the front of the cushion to
release the 2 clips that secure it to the frame. Do not fully remove
the cushion at this time.
 Before Driving
When snow and ice accumulate on your vehicle, moving
parts, such as the door handles, windows, mirrors, and
wipers can freeze in place. To achieve maximum range
and performance, it is helpful to warm the cabin and
Battery before you leave. There are several ways to do
so:
Touch Schedule, avai
© 2019-2026 Copyright www.tesms.org

