Tesla Model S: Acoustic Panel - Hood (Remove and Replace)
Tesla Model S (2012-2026) Service Manual / Closures / Acoustic Panel - Hood (Remove and Replace)
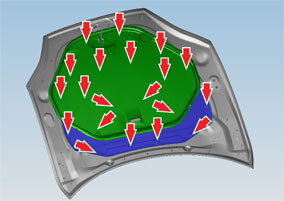
Removal
- Open the hood for access.
- Carefully release the clips (x14) that secure the hoodliner to
the hood.
Warning: To avoid personal injury, eye protection must be worn when performing this operation.

- Remove the hoodliner from the hood.
- Carefully release the clips (x6) that secure the acoustic panel
to the hood.
Warning: To avoid personal injury, eye protection must be worn when performing this operation.
- Remove the acoustic panel from the hood.
Installation procedure is the reverse of removal, except for the following:
Note: Clean the affected areas before installation.
Note: Use new clips when installing the acoustic panel and hoodliner.
READ NEXT:
 Power Strut - Liftgate (Remove and Replace)
Removal
Open the liftgate.
Support the liftgate in the open position.
Remove the RH C-post upper trim (refer to procedure).
Release the RH rear corner of the headlining from the b
Strut - Liftgate (Remove and Replace)
Removal
Open liftgate.
Support liftgate in open position.
Release clip securing gas strut to body.
Disconnect gas s
Latch - Liftgate (Remove and Replace)
Removal
Open liftgate and secure at working height.
Remove liftgate trim (refer to procedure)
Disconnect wiring harness connector.
Remove screws (x2) securing liftgate latch assem
SEE MORE:
Reservoir Assembly - Coolant (Remove and Replace)
Warning: If the 12V power supply is disconnected, do
not attempt to open any doors with door glass in closed position.
Failure to follow this instruction could result in door glass
shatter.
Note: Before disconnecting the 12V power supply,
ensure that the driver's door window
Pull Onto Flatbed Truck From Front
(Using Tow Eye)
NOTE: If Model S has no low voltage power, you need an
external low voltage power supply to open the hood or
use the touchscreen. See If Vehicle Has No Power.
CAUTION: To avoid damage, only pull the vehicle
onto a flatbed truck using a properly-installed tow
eye. Using the chassis, frame, or
© 2019-2026 Copyright www.tesms.org
