Tesla Model S: Power Strut - Liftgate (Remove and Replace)
Tesla Model S (2012-2026) Service Manual / Closures / Power Strut - Liftgate (Remove and Replace)
Removal
- Open the liftgate.
- Support the liftgate in the open position.
- Remove the RH C-post upper trim (refer to procedure).
- Release the RH rear corner of the headlining from the body. Note: Do not remove the headlining.
- Disconnect the power strut electrical harness connector.
- Release the electrical harness from the body.
- Release the clip that secures the power strut to the body.
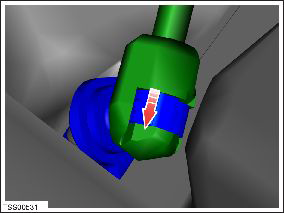
- Disconnect the power strut from the ball joint.
- Release the clip that secures the power strut to the liftgate.
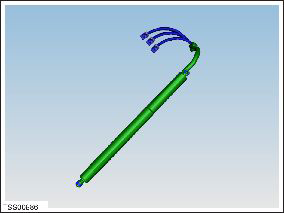
- Remove the power strut.
Installation procedure is the reverse of removal.
READ NEXT:
 Strut - Liftgate (Remove and Replace)
Removal
Open liftgate.
Support liftgate in open position.
Release clip securing gas strut to body.
Disconnect gas s
Latch - Liftgate (Remove and Replace)
Removal
Open liftgate and secure at working height.
Remove liftgate trim (refer to procedure)
Disconnect wiring harness connector.
Remove screws (x2) securing liftgate latch assem
Striker - Liftgate (Remove and Replace)
Removal
Open liftgate.
Remove liftgate striker cover.
Remove bolts (x2) securing striker to body (torque 10 Nm).
SEE MORE:
Sentry Mode - View Live Camera
NOTE: View Live Camera requires premium connectivity.
It also requires that version 4.2.1 (or newer) of the Tesla
mobile app is installed on a phone that has been paired
as a key to Model S.
When Sentry Mode is enabled, you can use the mobile
app to remotely view the area surrounding Model S as
Charging Equipment
Charging equipment designed specifically to charge
your Model S is available from Tesla. A Tesla Wall
Connector, which installs in your parking space, is the
fastest way to charge Model S for daily use.
Model S can also be charged using a Mobile Connector
and the appropriate adapter(s) that all
© 2019-2026 Copyright www.tesms.org
