Tesla Model S: Strut - Liftgate (Remove and Replace)
Tesla Model S (2012-2026) Service Manual / Closures / Strut - Liftgate (Remove and Replace)
Removal
- Open liftgate.
- Support liftgate in open position.
- Release clip securing gas strut to body.
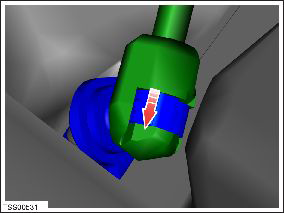
- Disconnect gas strut from ball joint.
- Release clip securing gas strut to liftgate.
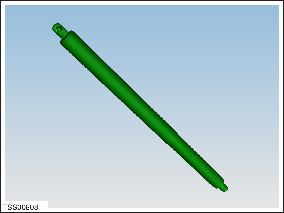
- Disconnect and remove gas strut.
- Installation procedure is the reverse of removal, except for the following. Note: Clean the affected areas before installation. Note: Apply the recommended grease to bearing/bushing surfaces.
- Lubricate both pivot points.
READ NEXT:
 Latch - Liftgate (Remove and Replace)
Removal
Open liftgate and secure at working height.
Remove liftgate trim (refer to procedure)
Disconnect wiring harness connector.
Remove screws (x2) securing liftgate latch assem
Striker - Liftgate (Remove and Replace)
Removal
Open liftgate.
Remove liftgate striker cover.
Remove bolts (x2) securing striker to body (torque 10 Nm).
Actuator - Cinching (Remove and Replace)
Removal
Open liftgate and secure at working height.
Remove liftgate trim (refer to procedure)
Remove screws x3 securing cinch motor to liftgate.
Release harness clip, rotate the c
SEE MORE:
Bolster - Side - Seat - 2nd Row - LH (Remove and Replace)
Removal
Fully open the LH rear door.
Release the LH rear seat back rest lock and push the rear seat
back rest flat for access.
Insert a wedge tool behind the bolster to provide outward
pressure.
Use a long s
Limitations and Inaccuracies
Collision Avoidance features cannot always detect all
objects, vehicles, bikes, or pedestrians, and you may
experience unnecessary, inaccurate, invalid, or missed
warnings for many reasons, particularly if:
The road has sharp curves.
Visibility is poor (due to heavy rain, snow, fog, etc.).
Br
© 2019-2026 Copyright www.tesms.org
