Tesla Model S: Applique - Liftgate (Remove and Replace)
Special tool required for this procedure:
| Supplier | Part Number | Description |
| Tesla | 1049517-00-A | Ergonomic Silicone Seam Roller |
| Bosch | 732-PHT318-TSL | Molding Hold Down Tool |
Caution: Protect exterior paint surfaces that surround the liftgate applique before performing this procedure.
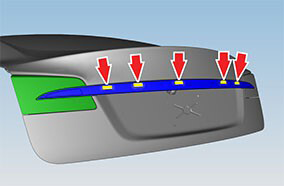
- Using a trim stick or other suitable tool, carefully and evenly
release the fasteners (x5) that secure the applique to the liftgate
body panel.
Caution: Care must be taken to avoid damage to exterior trim mounting points.
- Carefully release the adhesive tape that secures the applique to the fog/reverse lamps.
- Remove the rear applique.
- Inspect the clips for damage, and replace if required.
Installation procedure is the reverse of removal, except for the following:
- Remove all remaining adhesive from the applique and the tail/backup lamps.
- Clean the mating surfaces and lenses on the applique and the
tail/backup lamps with an isopropyl alcohol-based solution. Allow
the alcohol to fully dry before moving forward with the procedure.
Caution: In order to prevent cracking the lens, only use isopropyl alcohol to clean the lens.
- Apply new applique tape when reinstalling the applique.
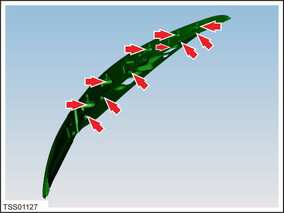
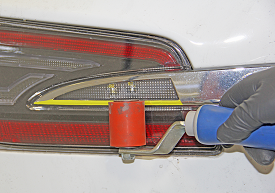
- Working outwards from the center of the applique, press very
firmly on the applique using a silicone seam roller to completely
seal the applique tape.
Caution: Do not damage the liftgate applique lenses.
Top path highlighted Bottom path highlighted 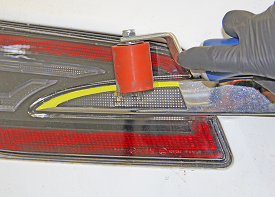
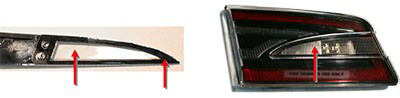
- Apply pressure to both ends of the applique:
- Secure both ends of the applique with tape.
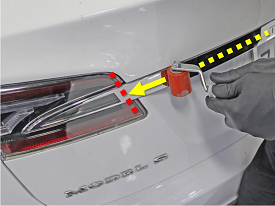
- Use molding hold down tools to apply pressure to each end of
the applique.
Caution: Do not damage the liftgate applique lenses.
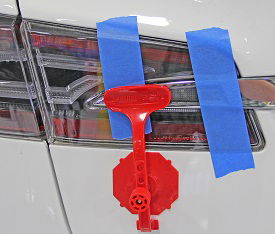
- Wait at least 5 minutes before removing the molding hold down tools and tape.
Caution: Failure to wait at least 5 minutes before removing the molding hold down tool can result in improper adhesion of the applique tape.
READ NEXT:
 Badge - Ludicrous Speed (Retrofit)
Special tool required for this procedure:
Supplier
Part Number
Description
Bracket - License Plate - Front (Retrofit)
Special tool required for this procedure:
Supplier
Part Number
Description
SEE MORE:
Autopilot
NOTE: Depending on market region, vehicle
configuration, options purchased, and software version,
your vehicle may not be equipped with all Autopilot
features described below.
Customize how some of the Autopilot features operate
to provide a safer and more convenient driving
experience. See Abo
Map Display
Touch these icons to customize what the map displays:
Display/hide satellite imagery
(if equipped
with premium connectivity).
Display/hide traffic conditions
(if equipped
with premium connectivity). Green lines
indicate no traffic; orange lines indicate
light traffic; red lines indicate moder
