Tesla Model S: Pre-Tensioner - Outboard Lap - 1st Row - LH (Remove and Replace)
Tesla Model S (2012-2026) Service Manual / Safety and Restraint / Pre-Tensioner - Outboard Lap - 1st Row - LH (Remove and Replace)
Removal
- Disconnect 12V power.
- Rear wheel drive (RWD): Refer to procedure.
- Dual Motor: Refer to procedure.
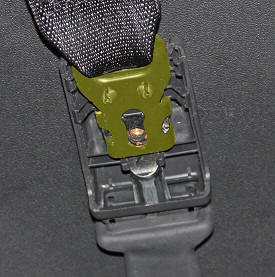
- Use a trim tool to carefully release the anchor bolt cap from
the inboard upper pre-tensioner cover.
.png)
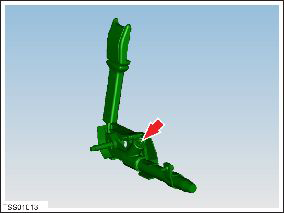
- Remove the bolt that secures the seat belt to the pre-tensioner
(torque 9 Nm).
.png)
- Remove the inboard upper pre-tensioner cover.
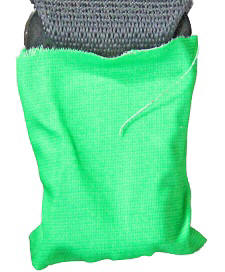
- Carefully release the seat belt assembly from the upper pre-tensioner
cover.
- Wrap the seat belt connector with protective tape to prevent it
from damaging any of the interior.
- Remove the lower B-pillar trim (refer to procedure).
- Remove the screw that secures the seat belt pre-tensioner cover
then remove the cover (torque 9 Nm).
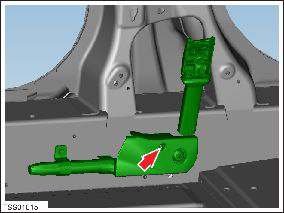
- Remove the bolt that secures the seat belt pre-tensioner support
bracket to the body of the vehicle:
- Model S vehicles built prior to December 8, 2015: Torque 9 Nm.
- Model S vehicles built on December 8, 2015 or later: Torque 5 Nm.
- Remove the bolt that secures the seat belt pre-tensioner to the
body of the vehicle (torque 40 Nm).
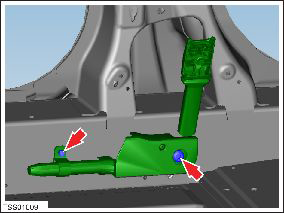
- Disconnect the seat belt pre-tensioner connector and harness.
- Remove the seat belt pre-tensioner from the vehicle.
Installation procedure is the reverse of removal.
READ NEXT:
 Pyrotechnic Fuse (Remove and Replace)
Warning: Prior to disconnection of 12 volt power supply,
ensure driver's door glass is in the fully open position. Failure to
follow this instruction could result in vehicle lockout.
Warni
Sensor - Intrusion - Door - Front (Remove and Replace)
Removal
Remove door trim panel (refer to procedure)
Remove screws (x2) securing impact sensor to door (torque 5 Nm).
Disconnect sensor harness connection.
Sensor - Impact - Front (Remove and Replace)
Warning: To avoid personal injury, observe all relevant
safety precautions before removing or testing any SRS components.
Removal
Remove the underhood storage unit:
SEE MORE:
Vacuum Pump (Remove and Replace)
Warning: If the vehicle
has air suspension, activate "Jack" mode on the touchscreen before
raising and supporting the vehicle.
Removal
Remove the underhood storage unit
(refer to procedure).
Release the locking ring that secures the
vacuum hose to the pum
High Voltage Components
Heat Pump Assembly
Front Drive Unit
Service Access Panel for High Voltage Components (Penthouse)
High Voltage Battery
High Voltage Busbars
Rear Drive Unit
Charge Port
NOTE: Plaid version not shown
WARNING: The high voltage system has no user serviceable parts. Do not
disassemble, remov
© 2019-2026 Copyright www.tesms.org
