Tesla Model S: Assembly - Bin - Storage Center Compartment (Remove and Replace)
Tesla Model S (2012-2026) Service Manual / Instrument Panels and Pedals / Assembly - Bin - Storage Center Compartment (Remove and Replace)
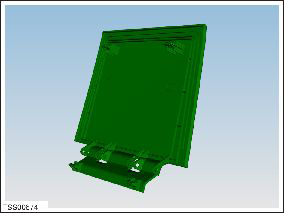
Removal
- Remove center console carpet. Caution: Apply contact adhesive to mating faces if bond has been broken.
- Release clips (x4) securing closing panel to dash.
Caution: Take care not to damage component(s).
Caution: Replace any broken clips.

- Remove storage center compartment closing panel.
READ NEXT:
 Assembly - Instrument Panel Lower - RH (Remove and Replace)
Removal
Remove the RH instrument panel side cover assembly (refer to
procedure).
Note: LH panel is illustrated; RH removal is
identical.
Using a
Assembly - Instrument Panel Side Cover - LH (Remove and Replace)
Removal
Release clips (x3) securing instrument panel side cover.
Note: Components have been removed in this graphic
to aid clarity.
Panel - A Pillar Trim - Middle - LH (Remove and Replace)
Removal
Position vehicle with clear access to door assembly.
Open vehicle door.
Remove LH instrument panel side cover (refer to procedure)
Release location pins (x2).
SEE MORE:
Sensor - Occupant Classification - Front Passenger's Seat - Calibration
Note: The OCS is not installed in all markets and is
currently only present in North America. This OCS re-zero
calibration procedure is for North America.
OCS Re-Zero Calibration
Ensure that no objects are on or under the passenger seat.
Warning: Performi
Air pressure in tires very low
PULL OVER SAFELY - Check for flat tire
This alert indicates that one or more of the tires on your vehicle is
extremely low or flat.
The tire pressure monitoring system (TPMS) has detected that the air pressure in
one or more of your tires is
significantly lower than the recommended cold tire pre
© 2019-2026 Copyright www.tesms.org
