Tesla Model S: Assembly - Instrument Panel Side Cover - LH (Remove and Replace)
Tesla Model S (2012-2026) Service Manual / Instrument Panels and Pedals / Assembly - Instrument Panel Side Cover - LH (Remove and Replace)
Removal
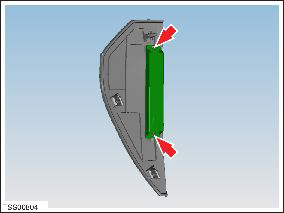
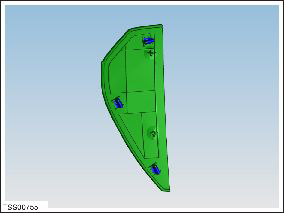
- Release clips (x3) securing instrument panel side cover.
Note: Components have been removed in this graphic to aid clarity.
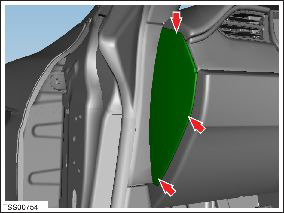
- Disconnect harness connector from key antenna.
- Remove screws (x2) securing antenna to trim (torque 1 Nm).
- Remove instrument panel side cover.
Caution: Take care not to damage component(s).
Caution: Replace any broken clips.
Installation procedure is the reverse of removal.
READ NEXT:
 Panel - A Pillar Trim - Middle - LH (Remove and Replace)
Removal
Position vehicle with clear access to door assembly.
Open vehicle door.
Remove LH instrument panel side cover (refer to procedure)
Release location pins (x2).
Assembly - Finisher - Instrument Panel - RH (Remove and Replace)
Removal
Remove the glove box assembly (refer to procedure).
In the upper area behind the glove box, remove the 2 screws
(torque 10 Nm) that secure the passenger airbag to the crossbar
Assembly - Mesh Grille - Defrost (Remove and Replace)
Removal
Remove the top pad for access to the mesh grille (refer to
procedure)
Remove the defrost mesh grille.
Installation
Installation procedure is the
SEE MORE:
Control Arm - Upper - Front - LH (Remove and Replace)
Warning: If the vehicle has air suspension, activate "Jack"
mode on the touchscreen before raising and supporting the vehicle.
Removal
Position the vehicle in preparation for raising it, but keep the
vehicle at ground level at this time.
Remove the LH underhood apron (refer
Steering Column (Remove and Replace)
Removal
Ensure that the front road wheels are in a straight ahead
position.
Remove the driver's side lower dash trim (refer to procedure).
Remove the steering controller module (refer to procedure).
Disconnect the steering column motor harness connectors (x2).
© 2019-2026 Copyright www.tesms.org
