Tesla Model S: Assembly - Closeout Extension - LH - Center Console (Remove and Replace)
Tesla Model S (2012-2026) Service Manual / Interior trim / Assembly - Closeout Extension - LH - Center Console (Remove and Replace)
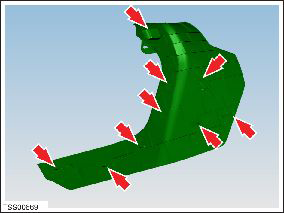
Removal
- Remove LH wrapped panel trim (refer to procedure)
- Remove mat from footwell.
- Release clips (x8) and adhesive pad (x1) securing closeout
extension to console.
Caution: Take care not to damage component(s).
Caution: Replace any broken clips.
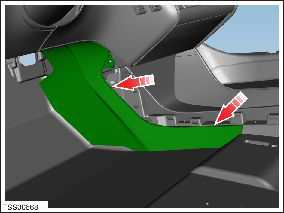
- Remove closeout extension trim.
Installation procedure is the reverse of removal.
READ NEXT:
 Cup Holder (Remove and Replace)
Removal
Remove center console assembly (refer to procedure)
Position center console on suitable clean bench to prevent
damage.
Caution: Take care not to damage component(s
Trim - Center Console - Rear (Remove and Replace)
Removal
Carefully release clips (x8) securing rear end console closing
trim to chassis.
Caution: Take care not to damage component(s).
Caution: Replace any broke
Assembly - Panel - Wrapped - LH (Remove and Replace)
Removal
Release the clips (x10) that secure the wrapped panel trim.
Note: Components have been removed in this graphic
to aid clarity.
SEE MORE:
Battery Care
Never allow the Battery to fully discharge. Even when
Model S is not being driven, its Battery discharges very
slowly to power the onboard electronics. The Battery
can discharge at a rate of approximately 1% per day,
though the discharge rate may vary depending on
environmental factors (such as
Buckle Assembly - 3rd Row - LH (Remove and Replace)
Warning: Prior to disconnection of 12 volt power supply,
ensure driver's door glass is in the fully open position. Failure to
follow this instruction could result in vehicle lockout.
Warning: If 12 volt power supply is disconnected, do not
attempt to open any doors with door glass in
© 2019-2026 Copyright www.tesms.org
