Tesla Model S: Assembly - Panel - Wrapped - LH (Remove and Replace)
Tesla Model S (2012-2026) Service Manual / Interior trim / Assembly - Panel - Wrapped - LH (Remove and Replace)
Removal
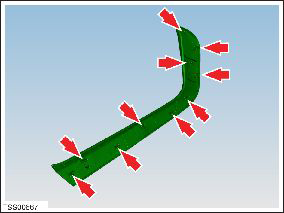
- Release the clips (x10) that secure the wrapped panel trim.
Note: Components have been removed in this graphic
to aid clarity.
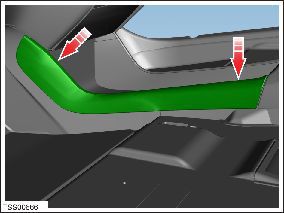
- Remove the LH wrapped panel trim.
Installation procedure is the reverse of removal.
READ NEXT:
 Vent - Center Console (Remove and Replace)
Removal
Remove center console rear closing panel (refer to procedure)
Move front center arm rests forward.
Using a suitable tool depress clips (x4) securing rear vent to
cente
Center Console Assembly (Remove and Replace)
Removal
Remove the drop in center console assembly, if installed (refer
to procedure).
Remove the under-screen cubby.
Remove the LH center console closeout extension (refer to
Drop In Center Console Assembly (Remove and Replace)
Removal
Move the front seats to their rearmost positions to allow for
additional access.
Unplug the phone adaptor cable from the USB connector, if
installed.
SEE MORE:
Battery - Auxiliary - 12V (Dual Motor) (Remove and Replace)
Warning: If the 12V power supply is disconnected, do
not attempt to open any doors with door glass in closed position.
Failure to follow this instruction could result in door glass
shatter.
Note: Before disconnecting the 12V power supply,
ensure that the driver's door window
Air Suspension - Depressurize - Full System
Depressurize
Connect a laptop with Toolbox to the vehicle.
Press the brake pedal to turn on the drive rails.
Leave the driver's door open to keep the drive rails on.
Use the Toolbox "Air Suspension Fill/Deflate" panel to
depressurize the system.
Pressurize
© 2019-2026 Copyright www.tesms.org
