Tesla Model S: Center Console Assembly (Remove and Replace)
Tesla Model S (2012-2026) Service Manual / Interior trim / Center Console Assembly (Remove and Replace)
Removal
- Remove the drop in center console assembly, if installed (refer to procedure).
- Remove the under-screen cubby.
- Remove the LH center console closeout extension (refer to procedure).
- Remove the RH center console closeout extension.
- Remove the rear center console trim (refer to procedure).
- Remove the fasteners (x2) that secure the rear end of the center
console chassis to the body (torque 10 Nm).
- Remove the fasteners (x2) that secure the front end of the center console chassis to the dash.
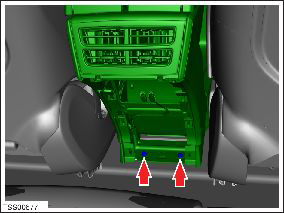
- Release the clips (x4) that secure the center console base
closing trim.
Caution: Take care not to damage component(s).
Caution: Replace any broken clips.
.png)
- Remove the center console base closing panel.
- Remove the fasteners (x2) that secure the center console base to the body (torque 3 Nm).
- Remove the driver side footwell bolt that secures the center console to the dash. Repeat this step for the passenger footwell bolt.
- Release the 2 fasteners that secure the console to the crosscar
beam (torque 3 Nm), then release the center console from the
adhesive pads (x6) and move rearward to access the console wiring
harness.

- Disconnect the harness connectors (x4).
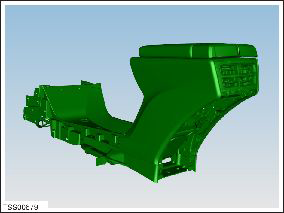
- Remove the center console from the vehicle.
READ NEXT:
 Drop In Center Console Assembly (Remove and Replace)
Removal
Move the front seats to their rearmost positions to allow for
additional access.
Unplug the phone adaptor cable from the USB connector, if
installed.
2nd Row Center Console Assembly (Remove and Replace)
Removal
Fold the RH 2nd row back rest.
Loosen the 2nd row center console tether strap behind the center
seat.
Unclip the tether latch from the child seat anchor.
Center Console - 2nd Row - Executive (Remove and Replace)
Removal
Move both front seats all the way forward.
Remove the felt tray from the console.
Remove the rubber padding from the base of the console and
cupholders.
Release the sc
SEE MORE:
Managing Keys
To display a list of all keys (phone keys, key cards, and key fobs) that can
access your Model S, touch Controls > Locks. An icon displays next to each key
to indicate whether the key is a phone key, key card, or key fob. Use this list
to manage keys that have access to your Model S. To add or
Handle - Interior Release - Door - Front - LH (Remove and Replace)
Removal
Remove front door trim panel (refer to procedure)
Release clips and remove door pad finisher.
Caution: Take care not to damage component(s).
Remove screws (x3) and nut (x1) securing interior doo
© 2019-2026 Copyright www.tesms.org
