Tesla Model S: Door - Charge Port - Non-Motorized (Remove and Replace)
Tesla Model S (2012-2026) Service Manual / High Voltage System / Door - Charge Port - Non-Motorized (Remove and Replace)
Removal
- Remove the LH tail light assembly (refer to procedure).
- Remove the screws (x3) that secure the charge port door to the
tail light assembly.
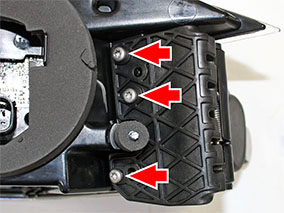
- Remove the charge port door.
Installation procedure is the reverse of removal, except for the following:
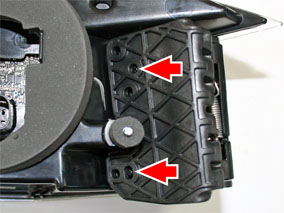
- Ensure that the studs on the tail light align with the slots on
the charge port door before installing the screws.
- Test the charge port door for proper fit and operation after the tail light is installed. Adjust the charge port door and tail light as necessary.
READ NEXT:
 Door - Charge Port - Single Phase - Motorized (Remove and Replace)
Note: The charge port door and motor are removed as an
assembly.
Removal
Remove the LH tail light assembly (refer to procedure).
Remove the screws (x3) that secure the charg
Slave Charger - LH - 1st Generation (Remove and Replace)
Note: This procedure describes how to remove and install
the 1st generation slave charger. If the vehicle is equipped with a
2nd generation slave charger, refer to procedure 44102102 (refer to
SEE MORE:
Air Suspension - Pressurize - Full System
Add Nitrogen to the Air Reservoir System
Warning: Wear eye protection while performing this
procedure.
Caution: Tesla recommends using a nitrogen refill kit to
refill the air suspension reservoir. Do not use shop air, which
might contain contaminants that could damage the
TPMS Sensor - ID Learn Procedure - Baolong
Setup
Turn on the Tesla SmarTool and select menu item
3 - Wakeup ID.
Starting with the front left wheel, hold the
tool against the tire sidewall, near the valve stem, and press
Enter.
Note: The tool will
ping the sensor and read its uniqu
© 2019-2026 Copyright www.tesms.org
