Tesla Model S: Examples of Correct and Incorrect Seating Positions
Correct seating position:

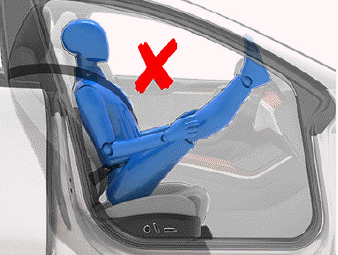
Incorrect seating position - the passenger's feet must be on the floor:
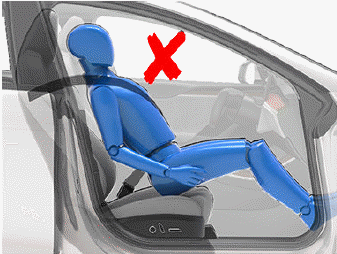
Incorrect seating position - the passenger must not slide forward on the seat cushion:
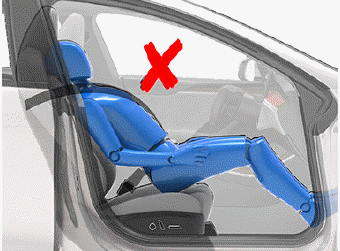
Incorrect seating position - the passenger must not recline the backrest to a laying down position when the vehicle is moving:
Inflation Effects
WARNING: When airbags inflate, a fine powder is released. This powder can irritate the skin and should be thoroughly flushed from the eyes and from any cuts or abrasions.
After inflation, the airbags deflate to provide a gradual cushioning effect for the occupants and to ensure the driver's forward vision is not obscured.
If airbags have inflated, or if your vehicle has been in a collision, always have the airbags, seat belt pre- tensioners and any associated components checked and, if necessary, replaced by Tesla.
In a collision, in addition to the airbags inflating:
- Doors unlock, and the door handles extend.
- Hazard warning lights turn on.
- Interior lights turn on.
- High voltage is disabled (you must contact Tesla Service to restore high voltage power).
- Seat belt pretensioners retract the seat belt anchor and seat belt webbing.
READ NEXT:
 Airbag Warning Indicator
The airbag indicator on the
instrument
cluster remains lit if the airbag system is
malfunctioning. The only time this indicator
should light up is briefly when Model S first
powers up, in which c
SEE MORE:
Sensor - Light/Rain (Remove and Replace)
Removal
Remove the rear view mirror trim. (refer to procedure)
Press the spring clip while lifting the corners of the clip to
remove the sensor from the bracket.
InstallationInstallation procedure is the revers
Reservoir Assembly - Coolant (Remove and Replace)
Warning: If the 12V power supply is disconnected, do
not attempt to open any doors with door glass in closed position.
Failure to follow this instruction could result in door glass
shatter.
Note: Before disconnecting the 12V power supply,
ensure that the driver's door window
