Tesla Model S: Face Level Vent - Driver's - Inner (Remove and Replace)
Tesla Model S (2012-2026) Service Manual / Instrument Panels and Pedals / Face Level Vent - Driver's - Inner (Remove and Replace)
Removal
- Remove driver side lower dash trim (refer to procedure).
- Remove the lower binnacle cover.
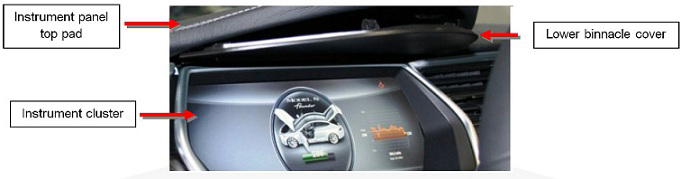
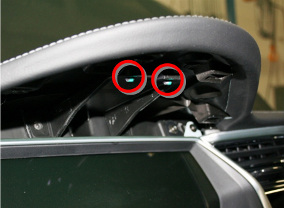
- Remove the 2 screws beneath the lower binnacle cover that secure
the IP top pad to the IP carrier.
- Lower the steering column and remove the steering column gap
hider by releasing the 2 trim clips.
- Apply protective tape along the center of the chrome strip that runs just beneath the top pad.
- Very carefully lift up the center of the top pad. Caution: Be very careful not to bend the top pad. If necessary, ask an assistant for help.
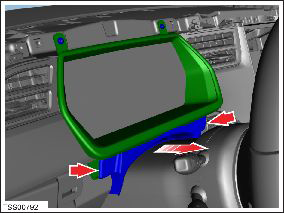
- Remove the trim and vent assembly by removing the 2 screws
(torque 1 Nm) and 3 clips that secure the vent and trim panel.
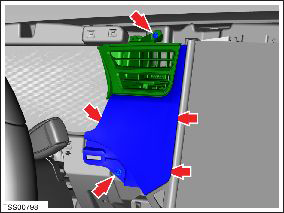
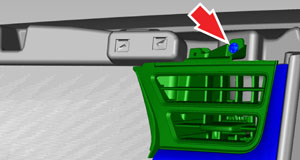
- Remove screws (x2) securing face vent to dash trim (torque 1 Nm).
- Remove vent from dash trim.
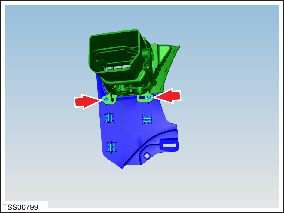
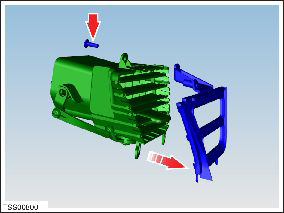
- Remove screw (x1) securing bezel to vent (torque 1 Nm).
- Remove bezel from vent.
Installation procedure is the reverse of removal.
READ NEXT:
 Face Level Vent - Front Passenger's - Outer (Remove and Replace)
Removal
Remove RH instrument panel finisher assembly (refer to
procedure)
Remove screws (x3) securing passenger outer face vent to trim
(torque 1 Nm).
Remove vent from trim.
Face Level Vent - Front Passenger's - Inner (Remove and Replace)
Removal
Remove RH instrument panel finisher assembly (refer to
procedure)
Remove screws (x3) securing passenger inner face vent to trim
(torque 1 Nm).
Remove vent from trim.
SEE MORE:
Trim - Rear View Mirror (Remove and Replace)
Removal
Position vehicle for access to front doors.
Cover dash assembly to avoid damage.
Caution: Make sure the touch screen is fully
protected.
Working from passenger side, carefully release clips (x5)
securing RH and LH mirror finishers.
Casing - Transmitter - Remote Keyless Entry (RKE)
Caution: Perform this procedure while using the proper anti-electrostatic
discharge equipment. Refer to TN-14-92-003, "Electrostatic Discharge
Tooling".
Removal
Remove the transmitter battery.
Hold the transmitter in one hand. Place the blade of a flat
screwdriver or si
© 2019-2026 Copyright www.tesms.org
