Tesla Model S: Finisher - Liftgate - Rear Window - Lower (Remove and Replace)
Tesla Model S (2012-2026) Service Manual / Interior trim / Finisher - Liftgate - Rear Window - Lower (Remove and Replace)
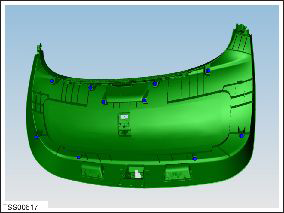
Removal
- Inspect the latch cover. If it is a separate trim part, remove
it with a trim tool. If is not a separate part, proceed to step 2.
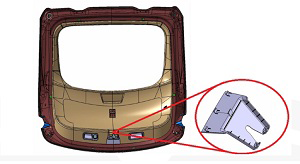
- Remove the liftgate upper trim finisher (refer to procedure).
- Remove the LH and RH liftgate side finishers (refer to procedure).
- Remove the screws (x2) that secure the lower trim panel (torque
3 Nm).
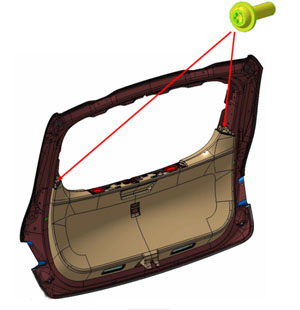
- Release the LH and RH pull cups by gently prying on all 4 sides
with a trim tool.
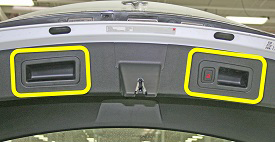
- Disconnect the liftgate button connector.
- Remove the LH and RH pull cups.
- Carefully release the clips (x10) that secure the liftgate lower
finisher.
Caution: Replace any broken clips.
Caution: Take care not to damage component(s).
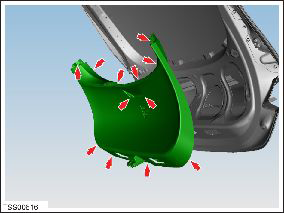
- Remove the liftgate lower trim.
Installation procedure is the reverse of removal, except for the following:
- If the latch cover is a separate trim piece, replace the entire lower liftgate trim panel with revision E or higher, if possible. In these revisions, the latch cover is part of the main finisher panel.
- Ensure that all clips are aligned before securing the liftgate trim panel.
READ NEXT:
 Finisher - Liftgate - Rear Window - Side - LH (Remove and Replace)
Removal
Remove the upper rear window finisher (refer to procedure).
Release the clips (x3) and remove the tailgate side finisher.
Caution: Take care not to damage componen
Panel - Door Trim - LH - Front (Remove)
Removal
Position the vehicle so that there is full access to the
driver's door.
Lower the window.
Open the door for access.
Remove the screws (x3) that secure the trim pad to
SEE MORE:
Seat Assembly - 3rd Row (Remove)
Removal
Open the liftgate.
Fold down the third row seats.
Caution: Take care not to damage component(s).
Caution: Protect the interior trim from possible damage.
Remove the bolts that secure the third row seatbelt straps
(torque 26
Fork and Control Link - Door - Exterior Handle - Front - LH (Remove and
Replace)
Removal
Remove Door Motor (refer to procedure)
Remove Door Grip (refer to procedure)
Remove press sensor screw.
Release door press sensor wiring connector.
Remove pivot pin connecting control link to PVT cartrid
© 2019-2026 Copyright www.tesms.org
