Tesla Model S: Panel - Door Trim - LH - Front (Remove)
Removal
- Position the vehicle so that there is full access to the driver's door.
- Lower the window.
- Open the door for access.
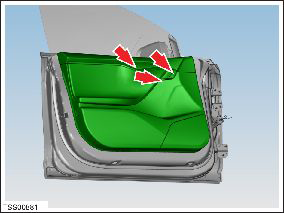
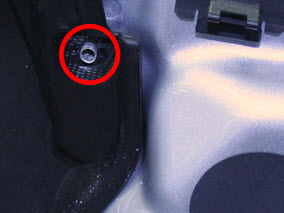
- Remove the screws (x3) that secure the trim pad to the door.
Note: Two of the screws are concealed by the door handle insert (torque 3 Nm) and one screw is concealed by the pull cup's rubber insert (torque 6 Nm).
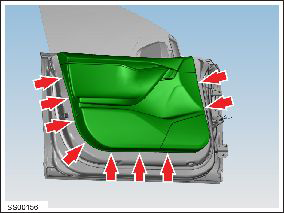
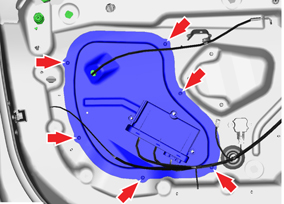
- Using a trim tool, remove and discard the heart flex clips (x9)
that secure the trim.
Caution: Take care not to damage component(s).
- Support the door trim and disconnect the latch release cable
from the inner door handle.
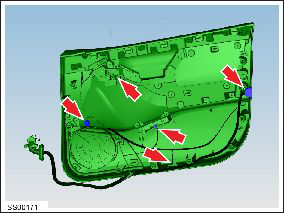
- Disconnect the puddle lamp connector.
- Disconnect the door switch harness connector.
- Disconnect the door pocket lamp harness connector.
- Disconnect the harness connector from the rear safety lamp.
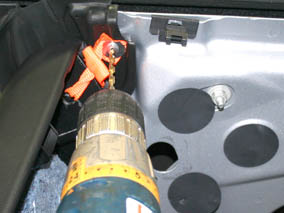
The next step only applies to vehicles with next generation seats. On these vehicles, a retention strap also secures the trim panel to the door.
- Remove the blind rivet that secures the retention strap.
- Remove the door glass (refer to procedure).
- Using a 3/16 in (4.5 mm) bit, drill out the rivet.
Warning: To avoid personal injury, eye protection must be worn when performing this operation.
- Remove the strap from the door panel. Discard the strap. Note: It is necessary to install a new strap during reinstallation.
- Remove the rivet shank from the door.
Note: The rivet shanks are aluminum and can not be retrieved with a magnet.
- Open and close the door several times; listen for any debris
that has fallen inside the door panel. If necessary, release the
screws (x6 ) that secure the regulator access panel (torque 4
Nm) and remove any debris.
- Remove the door trim panel from the vehicle.
READ NEXT:
 Panel - Door Trim - LH - Front (Install)
Installation
Installation procedure is the reverse of removal, except for the
following:
Caution: Do not reuse the heart flex clips; they are
one-time use only.
Vehicles
Panel - Door Trim - Front - LH (Remove and Replace)
Removal
Remove the driver's door switch pack (refer to procedure).
Release the clips that secure the speaker cover to the door
trim.
Caution: Take care not to damage compo
Panel - Door Trim - LH - Rear (Remove and Install)
Removal
Position the vehicle so that there is full access to the door.
Open the door for access.
Release the screw cover from the door trim panel.
Cautio
SEE MORE:
Air Conditioning System Precautions - General
The air conditioning system contains fluids and components which could
be potentially hazardous to the technician or the environment if not
serviced and handled correctly. The following guidelines are intended to
alert the technician to potential sources of danger and emphasize the
impor
Wall plug adapter error - Charge rate reduced
Plug adapter fully into Mobile Connector and retry
Your Mobile Connector is unable to communicate with the wall plug adapter.
Because your Mobile Connector cannot
monitor the wall plug adapter temperature, charge current is automatically
reduced to 8A.
It is recommended that you try the followin
