Tesla Model S: Finisher - Liftgate - Rear Window - Side - LH (Remove and Replace)
Tesla Model S (2012-2026) Service Manual / Interior trim / Finisher - Liftgate - Rear Window - Side - LH (Remove and Replace)
Removal
- Remove the upper rear window finisher (refer to procedure).
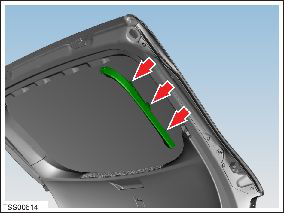
- Release the clips (x3) and remove the tailgate side finisher.
Caution: Take care not to damage component(s).
Note: Components have been removed in this graphic to aid clarity.
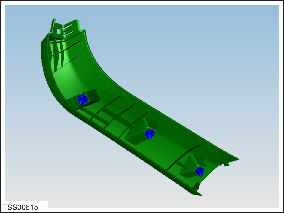
- Remove the tailgate side trim.
Caution: Replace any broken clips.
READ NEXT:
 Panel - Door Trim - LH - Front (Remove)
Removal
Position the vehicle so that there is full access to the
driver's door.
Lower the window.
Open the door for access.
Remove the screws (x3) that secure the trim pad to
Panel - Door Trim - LH - Front (Install)
Installation
Installation procedure is the reverse of removal, except for the
following:
Caution: Do not reuse the heart flex clips; they are
one-time use only.
Vehicles
SEE MORE:
Sensor - Pedestrian Protection (Remove and Replace)
Warning: If the 12V power supply is disconnected, do
not attempt to open any doors with door glass in closed
position. Failure to follow this instruction could result in
door glass shatter.
Note: Before disconnecting the 12V power supply,
ensure that the driver's door window
Lamp - Side Repeater - Front - LH (Remove and Replace)
Removal
Using a suitable tool carefully release fixing lugs (x2)
securing side repeater to front fender. NOTE: Wheel arch liner
removed for clarity.
Caution: Care must be taken to avoid damage to
paintwork and exterior trim.
Release side re
© 2019-2026 Copyright www.tesms.org
