Tesla Model S: Buckle Assembly - 2nd Row - LH (Remove and Replace)
Tesla Model S (2012-2026) Service Manual / Safety and Restraint / Buckle Assembly - 2nd Row - LH (Remove and Replace)
Warning: Prior to disconnection of 12 volt power supply, ensure driver's door glass is in the fully open position. Failure to follow this instruction could result in vehicle lockout.
Warning: If 12 volt power supply is disconnected, do not attempt to open any doors with door glass in closed position. Failure to follow this instruction could result in door glass shatter.
Removal
- Open liftgate and both rear doors for access.
- Remove 2nd row seat cushion (refer to procedure)
- Remove bolt securing seat belt buckle to body (torque 40 Nm).
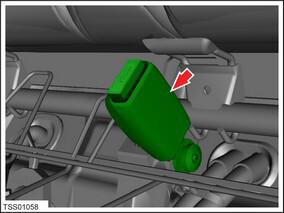
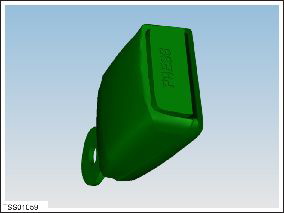
- Remove seat buckle assembly.
Installation process is reverse of removal.
READ NEXT:
 Seat Belt Assembly - 2nd Row - Center (Remove and Replace)
Removal
Remove the 2nd row seat cushion (refer to procedure)
Carefully release pegs (x2) securing seatbelt trim to seat back.
Seat Belt Assembly - 3rd Row - LH (Remove and Replace)
Removal
Maneuver the 3rd row seat for access to the anchor points (x4).
Remove the bolts (x4) that secure the seat belt to the body and
seat back (torque 45 Nm).
&
Buckle Assembly - 3rd Row - LH (Remove and Replace)
Warning: Prior to disconnection of 12 volt power supply,
ensure driver's door glass is in the fully open position. Failure to
follow this instruction could result in vehicle lockout.
Warni
SEE MORE:
Motor - Sunroof - RH (Remove and Replace)
Removal
Remove glove box assembly
(refer to procedure)
Disconnect sunroof motor harness connector.
Remove screws (x3) securing sunroof motor to
'A' post (torque 5 Nm).
Release sunroof motor assembly and disconnect
LF Antenna - RH - A Post (Remove and Replace)
Warning: If the vehicle has air suspension, activate "Jack"
mode on the touchscreen before raising and supporting the vehicle.
Removal
Raise and support the vehicle (refer to procedure)
Remove RH front wheel arch liner for access (refer to procedure)
Locate LF anten
© 2019-2026 Copyright www.tesms.org
