Tesla Model S: Panel - Door Trim - LH - Front (Install)
Tesla Model S (2012-2026) Service Manual / Interior trim / Panel - Door Trim - LH - Front (Remove and Install) / Panel - Door Trim - LH - Front (Install)
Installation
Installation procedure is the reverse of removal, except for the following:Caution: Do not reuse the heart flex clips; they are one-time use only.
Vehicles with next generation seats: To secure the retention strap to the door, perform the following steps:
Caution: Do not reuse the retention strap; it is one-time use only.
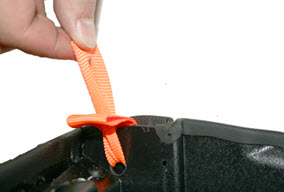
- Fold the retention strap in half lengthwise. Feed the
side of the strap with the 2 holes in between the inner and
outer trim panels.
Caution: Do not damage the weave on the strap.
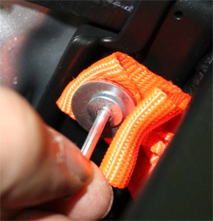
- Pull the bottom part of the strap through the hole, then
route it through the slit in the upper part of the strap.
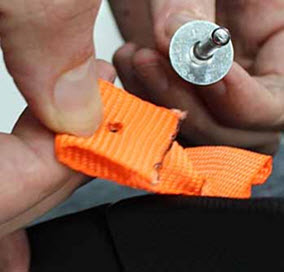
- Fold the free end of the retention strap back onto
itself so that the 2 holes align.
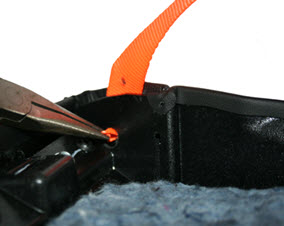
- Align the holes in the strap with the hole in the upper
rear section of the door frame, then loosely install a new
rivet.
- Use a rivet tool to secure the strap to the door panel.
Caution: Ensure that the rivet tool is perpendicular to the door panel to ensure that the rivet is installed correctly.
READ NEXT:
 Panel - Door Trim - Front - LH (Remove and Replace)
Removal
Remove the driver's door switch pack (refer to procedure).
Release the clips that secure the speaker cover to the door
trim.
Caution: Take care not to damage compo
Panel - Door Trim - LH - Rear (Remove and Install)
Removal
Position the vehicle so that there is full access to the door.
Open the door for access.
Release the screw cover from the door trim panel.
Cautio
Panel - Door Trim - LH - Rear (Remove and Replace)
Removal
Remove the rear window lift switch (refer to procedure).
Release the clips (x4) that secure the speaker cover to the door
trim.
Caution: Take care not to damage co
SEE MORE:
Starting/Discharging the System
Starting the System
Press the emergency stop button to disable HV systems.
Pull out the display/keyboard/trackpad tray.
Press the red power button to turn on the on-board PC.
Follow the onscreen instructions to log in to the system.
Userna
Brake Caliper - Rear - Park Brake - LH (Remove and Replace)
Note: If the event of a
stuck caliper or motor failure, refer to one of these procedures to
release the caliper:
Rear Park Brake Caliper - Caliper Seized/Motor Failure - Release
Caution: This method
requires replacing the caliper after it has been released.
© 2019-2026 Copyright www.tesms.org
