Tesla Model S: Fork and Control Link - Door - Exterior Handle - Rear - LH (Remove and Replace)
Tesla Model S (2012-2026) Service Manual / Closures / Fork and Control Link - Door - Exterior Handle - Rear - LH (Remove and
Replace)
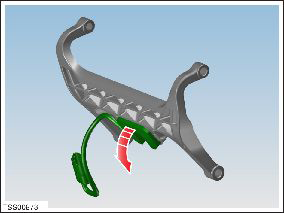
Removal
- Remove Door Motor (refer to procedure)
- Remove Door Grip (refer to procedure)
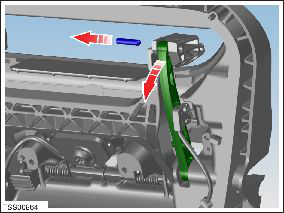
- Remove press sensor screw.
- Release door press sensor wiring connector.
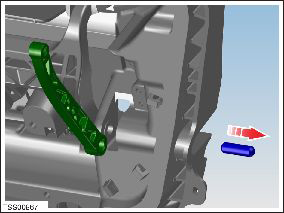
- Remove pivot pin connecting control link to PVT cartridge.
- Position control link and remove screw securing position sensor
to link (torque 1 Nm).
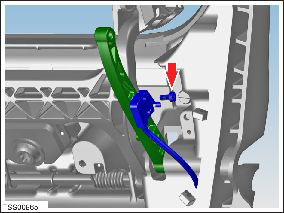
- Remove screw securing position sensor to housing, release
connector and remove position sensor and harness assembly (torque
1.5 Nm).
- Remove control link pivot pin to housing and remove control
link.
- Release torsion springs (x2) from fork.
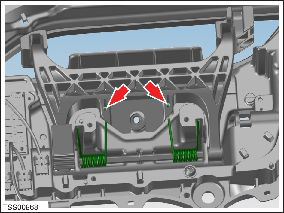
- Remove circlip retaining fork pivot shaft.
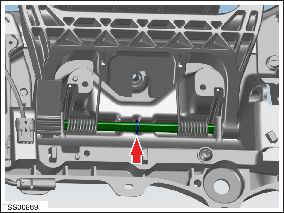
- Using a suitable drift, remove fork pivot shaft, collect torsion
springs and paddle gear.
Note: DO NOT use excessive force to fit the pivot shaft. If all components are correctly aligned, firm hand pressure on a drift will be sufficient.

- Remove fork assembly from housing.
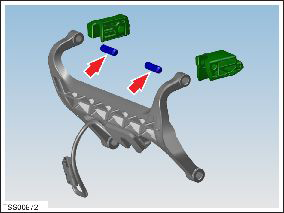
- Remove pivot pins securing pvt cartridges to fork, taking note
of installed position. Remove cartridges.
- If door press sensor is to be replaced. Using a suitable flat
blade, release double sided tape and remove sensor from the fork.
- If door pressure sensor is to be replaced, remove double sided tape backing and install sensor to fork.
- Install the PVT cartridges to the fork and fit pivot pins. Check orientation of cartridges.
- Position paddle gear to fork and install fork to housing.
- Install torsion springs to housing.
- Install the fork pivot shaft, ensuring the flat section is uppermost. Align paddle gear, springs and fork to housing as pivot is inserted. Note: DO NOT use excessive force to fit the pivot shaft. If all components are correctly aligned, firm hand pressure on a drift will be sufficient.
- Install the circlip retaining fork pivot shaft and engage the torsion springs to fork.
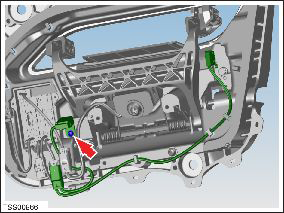
- Position and align control link to housing, ensure orientation is correct. Install the pivot pin to control link.
- Align harness and position sensors to housing control link. Align position sensor dowels and fit screws.
- Align control link to PVT cartridge and fit pivot pin
- Install the door press sensor adjusting screw engage the first ten threads.
READ NEXT:
 Position Switch Harness - Door Handle (Remove)
Note: This procedure is valid for all 2nd generation
door handles.
Special tools required for this procedure:
Supplier
Part Number
Description
Position Switch Harness - Door Handle (Replace)
Installation
Install the microswitch harness.
Reinstall all components other than the door backing. Leave the
harnesses loose.
Note: If performing this procedure o
SEE MORE:
Airbag Warning Indicator
The airbag indicator on the
instrument
cluster remains lit if the airbag system is
malfunctioning. The only time this indicator
should light up is briefly when Model S first
powers up, in which case it turns off within
a few seconds. If it remains lit, contact
Tesla immediately and do not dri
Volume Controls
Roll the scroll button on the left side of the steering
yoke up or down to increase or decrease volume
respectively. The scroll button adjusts the volume for
media, voice commands, and phone calls.
NOTE: Your Model S automatically adjusts the volume
based on driving speed and climate settings.
Y
© 2019-2026 Copyright www.tesms.org
