Tesla Model S: Position Switch Harness - Door Handle (Replace)
Tesla Model S (2012-2026) Service Manual / Closures / Position Switch Harness - Door Handle (Remove and Replace) / Position Switch Harness - Door Handle (Replace)
Installation
- Install the microswitch harness.
- Reinstall all components other than the door backing. Leave the harnesses loose. Note: If performing this procedure on a rear door handle, do not install the lower rear screw for the motor bracket.
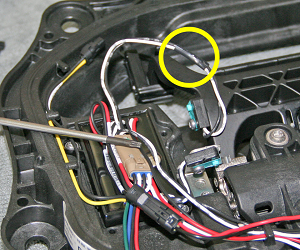
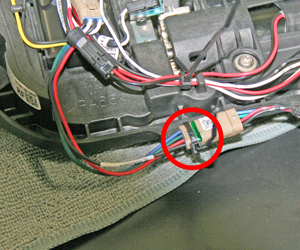
- Route the harnesses under the tabs as shown:
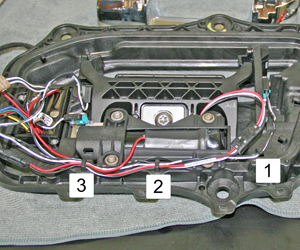
1 Microswitch harness 2 Microswitch and motor harnesses 3 Microswitch, motor, and pressure harnesses - Route the LED harness along the front of the handle and secure the connector.
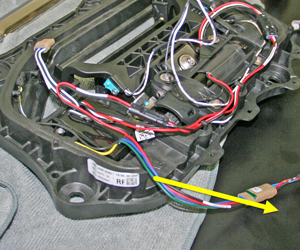
- Move the primary door harness towards the bottom of the handle
and out of the working area.
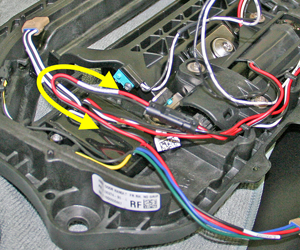
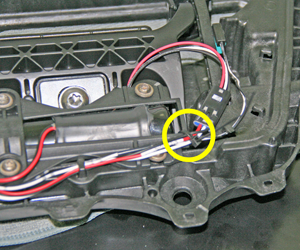
- Route the motor harness:
- Front door handle: Route the harness so that it
forms a loop above the door module.
- Rear door handle: Route the motor harness so that it
forms 2 loops below the door module.
- Front door handle: Route the harness so that it
forms a loop above the door module.
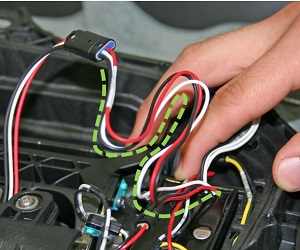
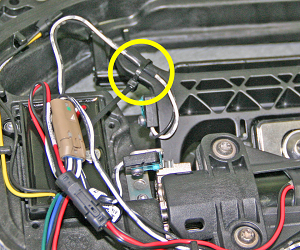
- Push the harnesses onto the module and hold them in place. Loop
the microswitch harness so that the taped section is routed over the
plastic extrusion.
- Use a cable tie to secure the taped section of harness to the
plastic extrusion. Discard any excess tie.
- Use a cable tie to secure the microswitch, motor, and pressure
harnesses together as shown. Discard any excess tie.
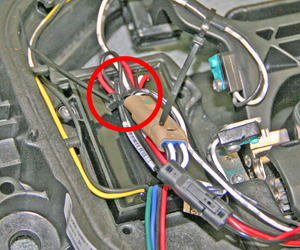
- Use a cable tie to secure the microswitch, motor, and pressure
harnesses together as shown. Discard any excess cable tie.
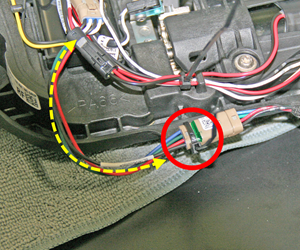
- Form a drip loop in the primary door harness, then use a cable
tie to secure the primary door harness connector to the door handle
as shown. Discard any excess tie.
- Use a cable tie to secure the pressure switch to the door handle
as shown. Discard any excess cable tie.
- Install a new door handle cover.
- Reinstall the door handle.
READ NEXT:
 Door Glass - LH - Front - Adjust
Removal
Remove door trim pad (refer to procedure)
Loosen but do not remove clamp nut securing door glass to
regulator (torque 7.5 Nm). This allows glass to move fore and aft.
Cauti
Door Glass - LH - Front (Remove and Replace)
Removal
Remove door inner belt glass seal (refer to procedure)
Loosen but do not remove clamp nut securing door glass to
regulator (torque 7.5 Nm).
Caution: Take care not
Door Glass - LH - Rear - Adjust
Removal
Remove door trim pad (refer to procedure)
Partially lower glass for access to glass clamp.
Remove water proof tape for access to adjustment clamp.
Loosen but do not remove
SEE MORE:
Sensor - Ride Height - Front - LH (Remove and Replace)
Warning: If the vehicle has air suspension, activate "Jack"
mode on the touchscreen before raising and supporting the vehicle.
Removal
Position the vehicle on a lift, but do not raise the vehicle at
this time.
Loosen the front LH lug nuts (torque 175 Nm).
Remove the
Forward Junction Box - 2nd Generation - 40 Amp Fuse (RWD) (Remove and
Replace)
Warning: Only technicians who have been trained in High
Voltage Awareness are permitted to perform this procedure. Proper
personal protective equipment (PPE) and insulating HV gloves with a
minimum rating of class 00 (500V) must be worn any time a high
voltage cable is handled. Refer
© 2019-2026 Copyright www.tesms.org
