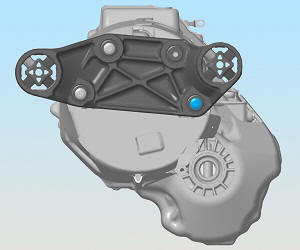
Tesla Model S: Mount - Front Drive Unit - RH (Remove and Replace) - Removal
Warning: If the 12V power supply is disconnected, do not attempt to open any doors with door glass in closed position. Failure to follow this instruction could result in door glass shatter.
Note: Before disconnecting the 12V power supply, ensure that the driver's door window is fully open. Failure to follow this instruction could result in vehicle lockout.
Special tools required for this procedure:
| Supplier | Part Number | Description |
| Tesla | 1054160-00-A | Support Jack, Front DU |
| Tesla | 1056542-01-A | Special 15 mm Ratchet Wrench |
| Tesla | 1056566-00-A | Locating Shim Set, Front drive unit |
- Loosen the front RH wheel lug nuts (x5).
- Remove the HV battery (refer to procedure).
- Remove the bolts (x2) that secure the coolant pump bracket to
the body of the vehicle.
- Disconnect the electrical connector from the battery coolant pump.
- Carefully secure the coolant pump away from the working area.
- Lower the vehicle.
- Remove the 12V battery bracket beam (refer to procedure).
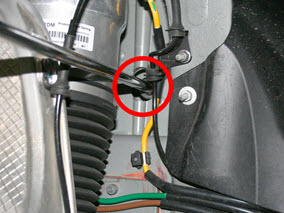
- Release the fir tree clips (x2) that secure the 12V positive
harness to the front cross car beam.
.png)
- Move the 12V positive harness to the RH side of the vehicle to
keep it out of the working area.
.png)
- Release the bolts (x4) that secure the coolant reservoir to the
cross car beam. Do not remove the reservoir at this time.
.png)
- Carefully lift up the coolant reservoir and disconnect the
coolant level sensor harness.
.png)
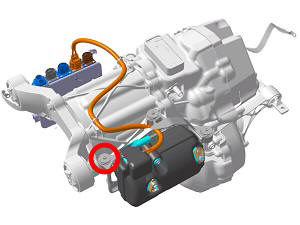
- Remove the RH bolt that secures the A/C compressor bracket to
the front drive unit.
Note: This allows the jack strap to slide between the front drive unit and the compressor.
- Release the bolt that secures the coolant pump to the LH side of
the front cross car beam.
.png)
- Remove the bolts (x4) that secure the front fuse boxes to the front shock tower crossmember. Move both fuse boxes behind the cross car beam.
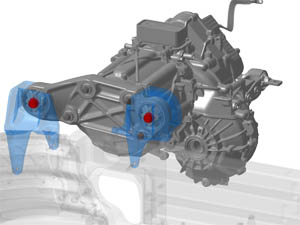
- Position the support jack on top of the cross car beam and
secure the screws (x2) to the cross car beam.
Note: The support jack mounts to the bolt holes that secured the coolant reservoir.
.png)
- Fully lower both mounts of the support jack.
- Position the RH strap between the front drive unit and the A/C
compressor:
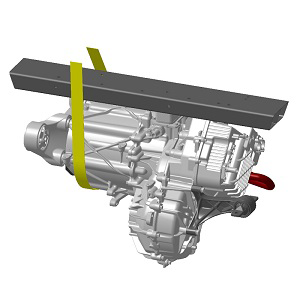
- Lower one end of the strap over the top of the support jack and behind the front cross car beam.
- Reach beneath the drive unit and pull the strap upwards.
- Secure the two ends of the strap with the carabiner.
- Slide the strap so that the carabiner is approximately 6 inches (150 mm) above the front cross car beam.
- Raise both sides of the support jack alternately until the strap is fully taut. Caution: Even though only one strap is used in this procedure, it is important to raise both sides of the support jack.
- Raise the vehicle partially and remove the front RH wheel.
- Release the plastic rivets that secure the rear of the upper front arch liner, then pull the arch liner forward.
- Fully raise the vehicle.
- Remove and discard the upper forward bolt that secures the mount
to the drive unit.

- Release the lower forward bolt that secures the mount to the
drive unit.
Note: The lower bolt cannot be completely removed at this time.
- Lower the vehicle.
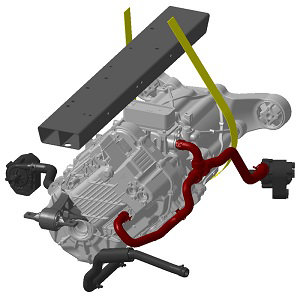
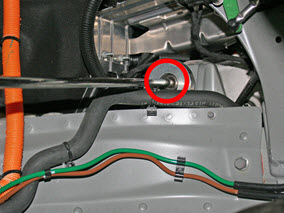
- Release the edge clip that secures the coolant pump hose to the body of the vehicle. Move the coolant hose away from the working area.
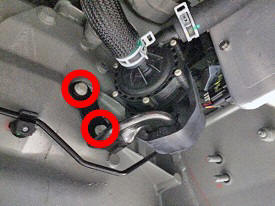
- Working from the RH wheelwell, use a socket wrench with an
extension to remove the bolts (x2) that secure the mount to the
body.
- Remove the rear bolt and washer.
- Remove the front bolt.
- Remove the rear bolt and washer.
- Remove and discard the upper rear bolt that secures the mount to
the drive unit.

- Release the lower rear bolt that secures the mount to the drive
unit.
Note: The lower bolts (x2) cannot be completely removed from the mount at this time.
- Raise the vehicle.
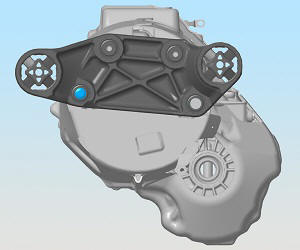
- Remove the RH drive unit mount. Note: Maneuver the mount between the coolant hoses during removal.
- Remove and discard the remaining lower bolts (x2) from the drive
unit mount.
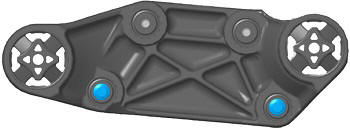
- If equipped, remove the shear plate from the drive unit mount.
READ NEXT:
 Mount - Front Drive Unit - RH (Remove and Replace) - Installation
Installation
Use alcohol wipes to clean the mating surfaces between the RH
drive unit mount and drive unit.
Place a shear plate on the outboard side of the drive unit mount
so that
Mount - Front Drive Unit - LH (Remove and Replace) - Removal
Warning: If the 12V power supply is disconnected, do
not attempt to open any doors with door glass in closed position.
Failure to follow this instruction could result in door glass
shat
SEE MORE:
Key Fob
You can quickly familiarize yourself with the key fob by
thinking of it as a miniature version of Model S, with the
Tesla badge representing the front. The key has buttons
that feel like softer areas on the surface.
Rear trunk - Double-click to open or close the rear
trunk. Hold down for one
North America and Japan only: Inspect the shield collar clamp
Insert the HVIL bolt into the shield collar clamp by 2 threads.
1
Install HVIL bolt 2
threads
With the HVIL bolt loosely installed, move the bolt from side to
si
